

10 Best Violins for Beginners: A Violin Teacher’s Ultimate Guide [2026]
/
You’re want to learn violin and now you’re wondering, “what are the best violins for beginners?” Then you start researching beginner violins and get overwhelmed pretty quickly. Unfortunately, the market is saturated with cheap, poorly made VSOs (violin-shaped-objects). Many of my students show up to their first lesson with these inferior “violins.” They are difficult or impossible to tune, produce an awful tone, and come with low-quality bows, chin rests, and other accessories.
Students with low quality violins generally take one of two paths. They get frustrated and quit or they get frustrated and buy a better violin. Learning to play the violin or teaching yourself to play violin is hard enough. You shouldn’t have to struggle with a VSO as well. That’s why you want a good quality beginner violin.
Trying to make an informed choice on such an important purchase can be difficult. Reading beginner violin reviews can be misleading and confusing. Everyone has an opinion, so who can you trust?
I’ve been teaching violin over 20 years to thousands of students, in person, online, and through my studio membership, Meadowlark Violin Studio. I’ve seen an endless number of VSOs and real beginner violins.
To save you time, money and frustration, I’ve created an ultimate guide to helping you choose the best beginner violin. I’ve had experience with every violin I’m about to tell you about. I’ve either played the violins myself or have students who have played or own the violins. In this guide, I’ll answer these questions. Click to skip ahead to each section.
You may also having questions about buying vs. renlfting your first violin. If you are buying a violin for a child or young adult, you’ll also want to measure in order to get the right size.
These other resources may be helpful if you are just starting to learn violin:
Can You Teach Yourself to Play Violin? Yes! Here’s 3 Reasons Why
Am I Too Old to Learn the Violin? A Violin Teacher’s Honest Opinion
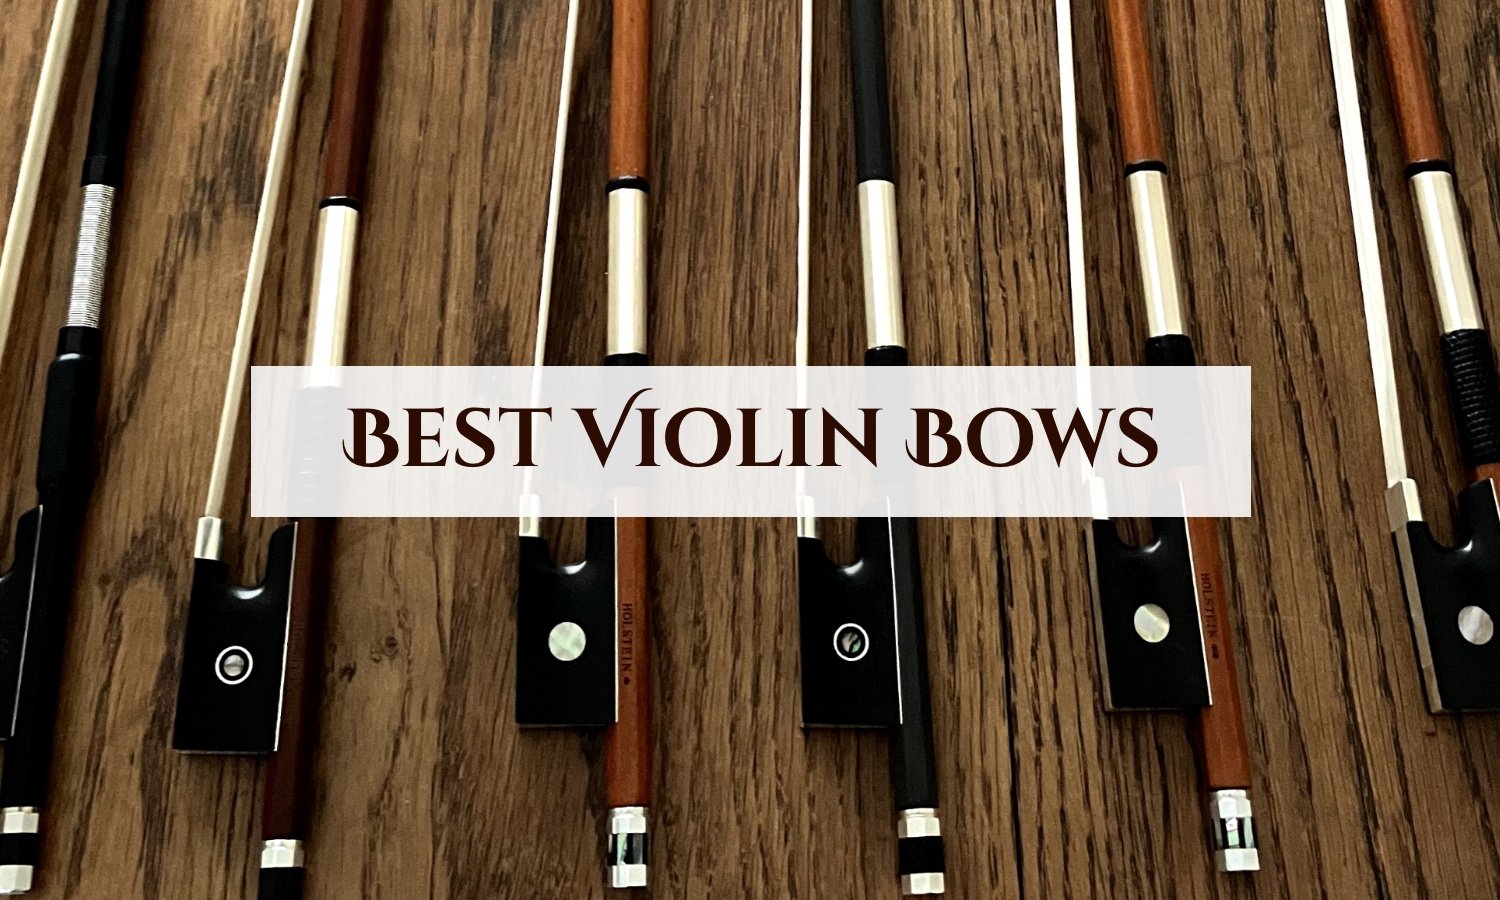
If you’re looking for a better bow, check out my recommendations in my article: Best Violin Bow: A Violin Teacher’s Guide to Choosing the Right Bow.
Let’s get started!
Sneak Peak at My Top Recommondations
Keep reading for detailed reviews on my favorite violins and to learn more about why I choose these violins. But if you just want to start playing, here’s my top recommendations!
Most Affordable: Tower Strings
Best Sound: Antonio Giuliani Etude
Won’t Hold You Back: Louis Carpini G2
What Makes a Good Beginner Violin?
Good materials
Real violins are made of quality materials. Many cheap violins come with plastic parts, wood that hasn’t been dried properly, or wood painted to look like real ebony for the fingerboard. Substandard parts means the violin will never function the way it is supposed to.
Proper Set-Up
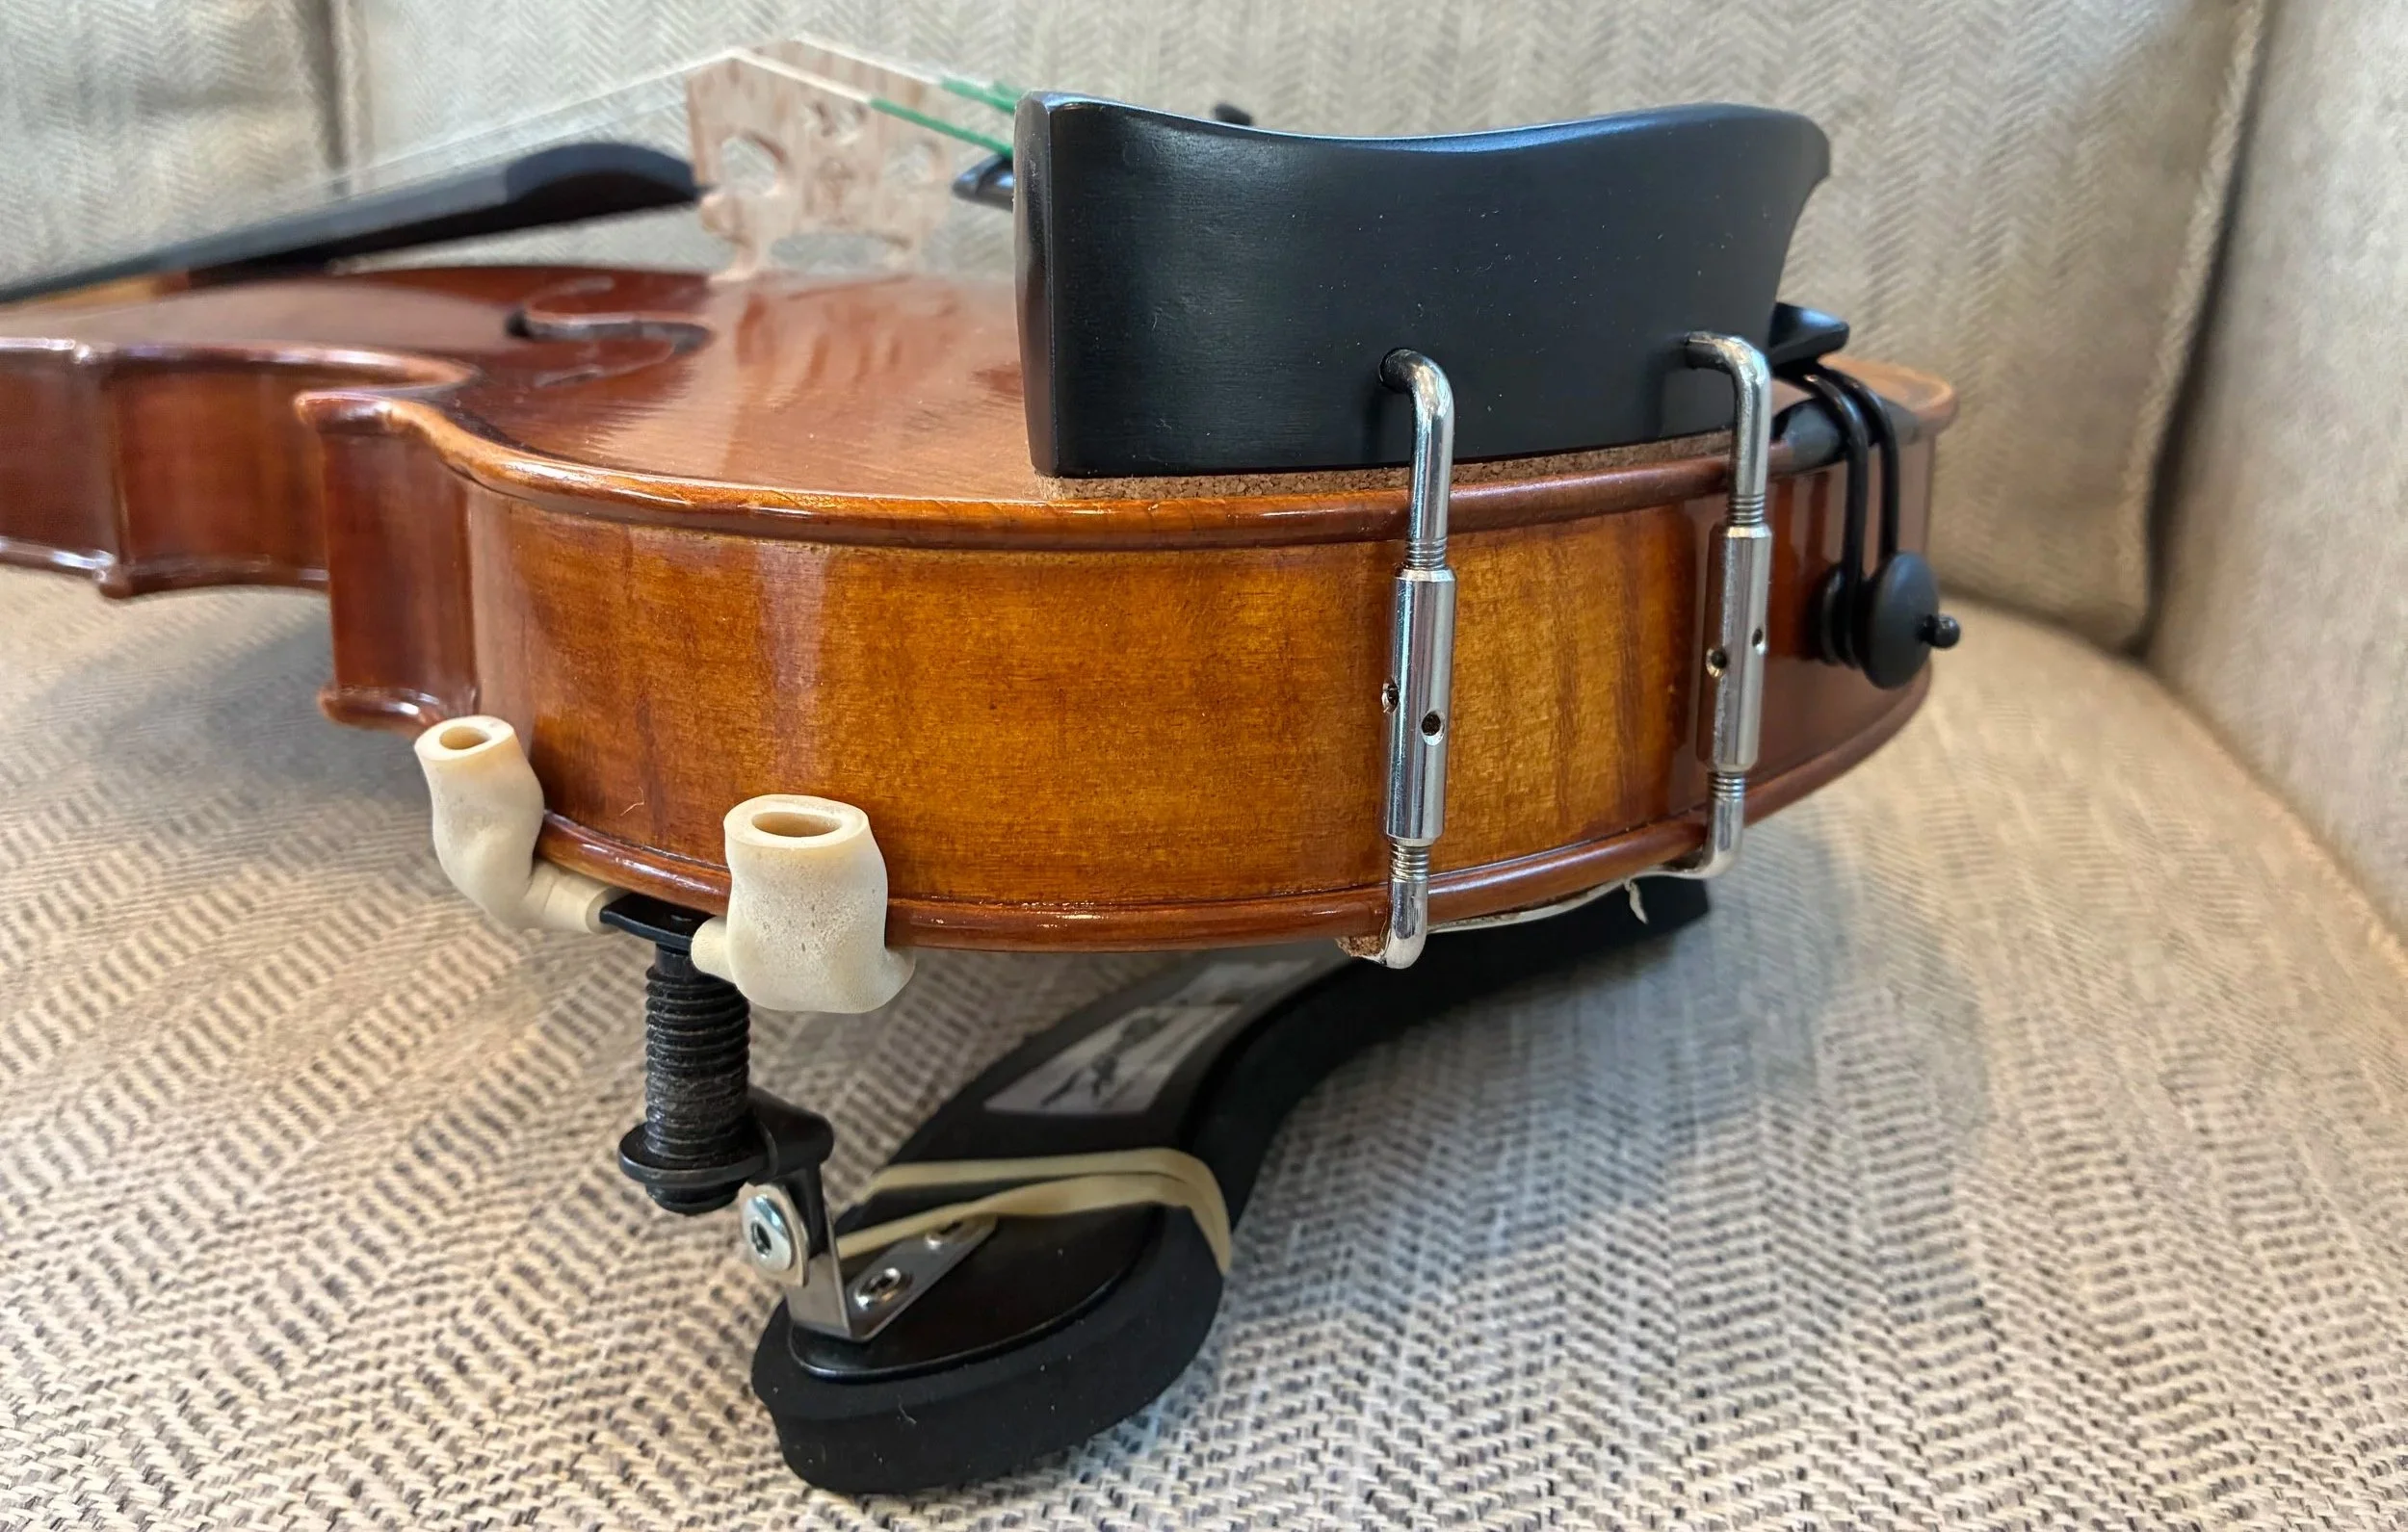
Any violin you purchase should be correctly “set-up” by a luthier before being sent to you. Many cheap, factory violins lack this important step. A luthier will make sure the bridge is the correct curvature (otherwise you’ll hit other strings no matter how you bow). They will also ensure the strings are the proper tension, so you don’t have to be a weight-lifter just to put a finger down. A luthier will also ensure the pegs are correctly installed and other parts are functioning before shipping the violin to you.
Easy to tune
Why is tuning so important? You must tune every time you play so that your muscle memory develops correctly. Having a violin that won’t stay in tune wastes practice time and lesson time.
VSOs (violin shaped objects) can be notoriously impossible to tune. A quality beginner violin will have pegs that correctly fit their holes and be relatively easy to tune. I’ve seen some VSOs come with plastic pegs, meaning the pegs will slip no matter what.
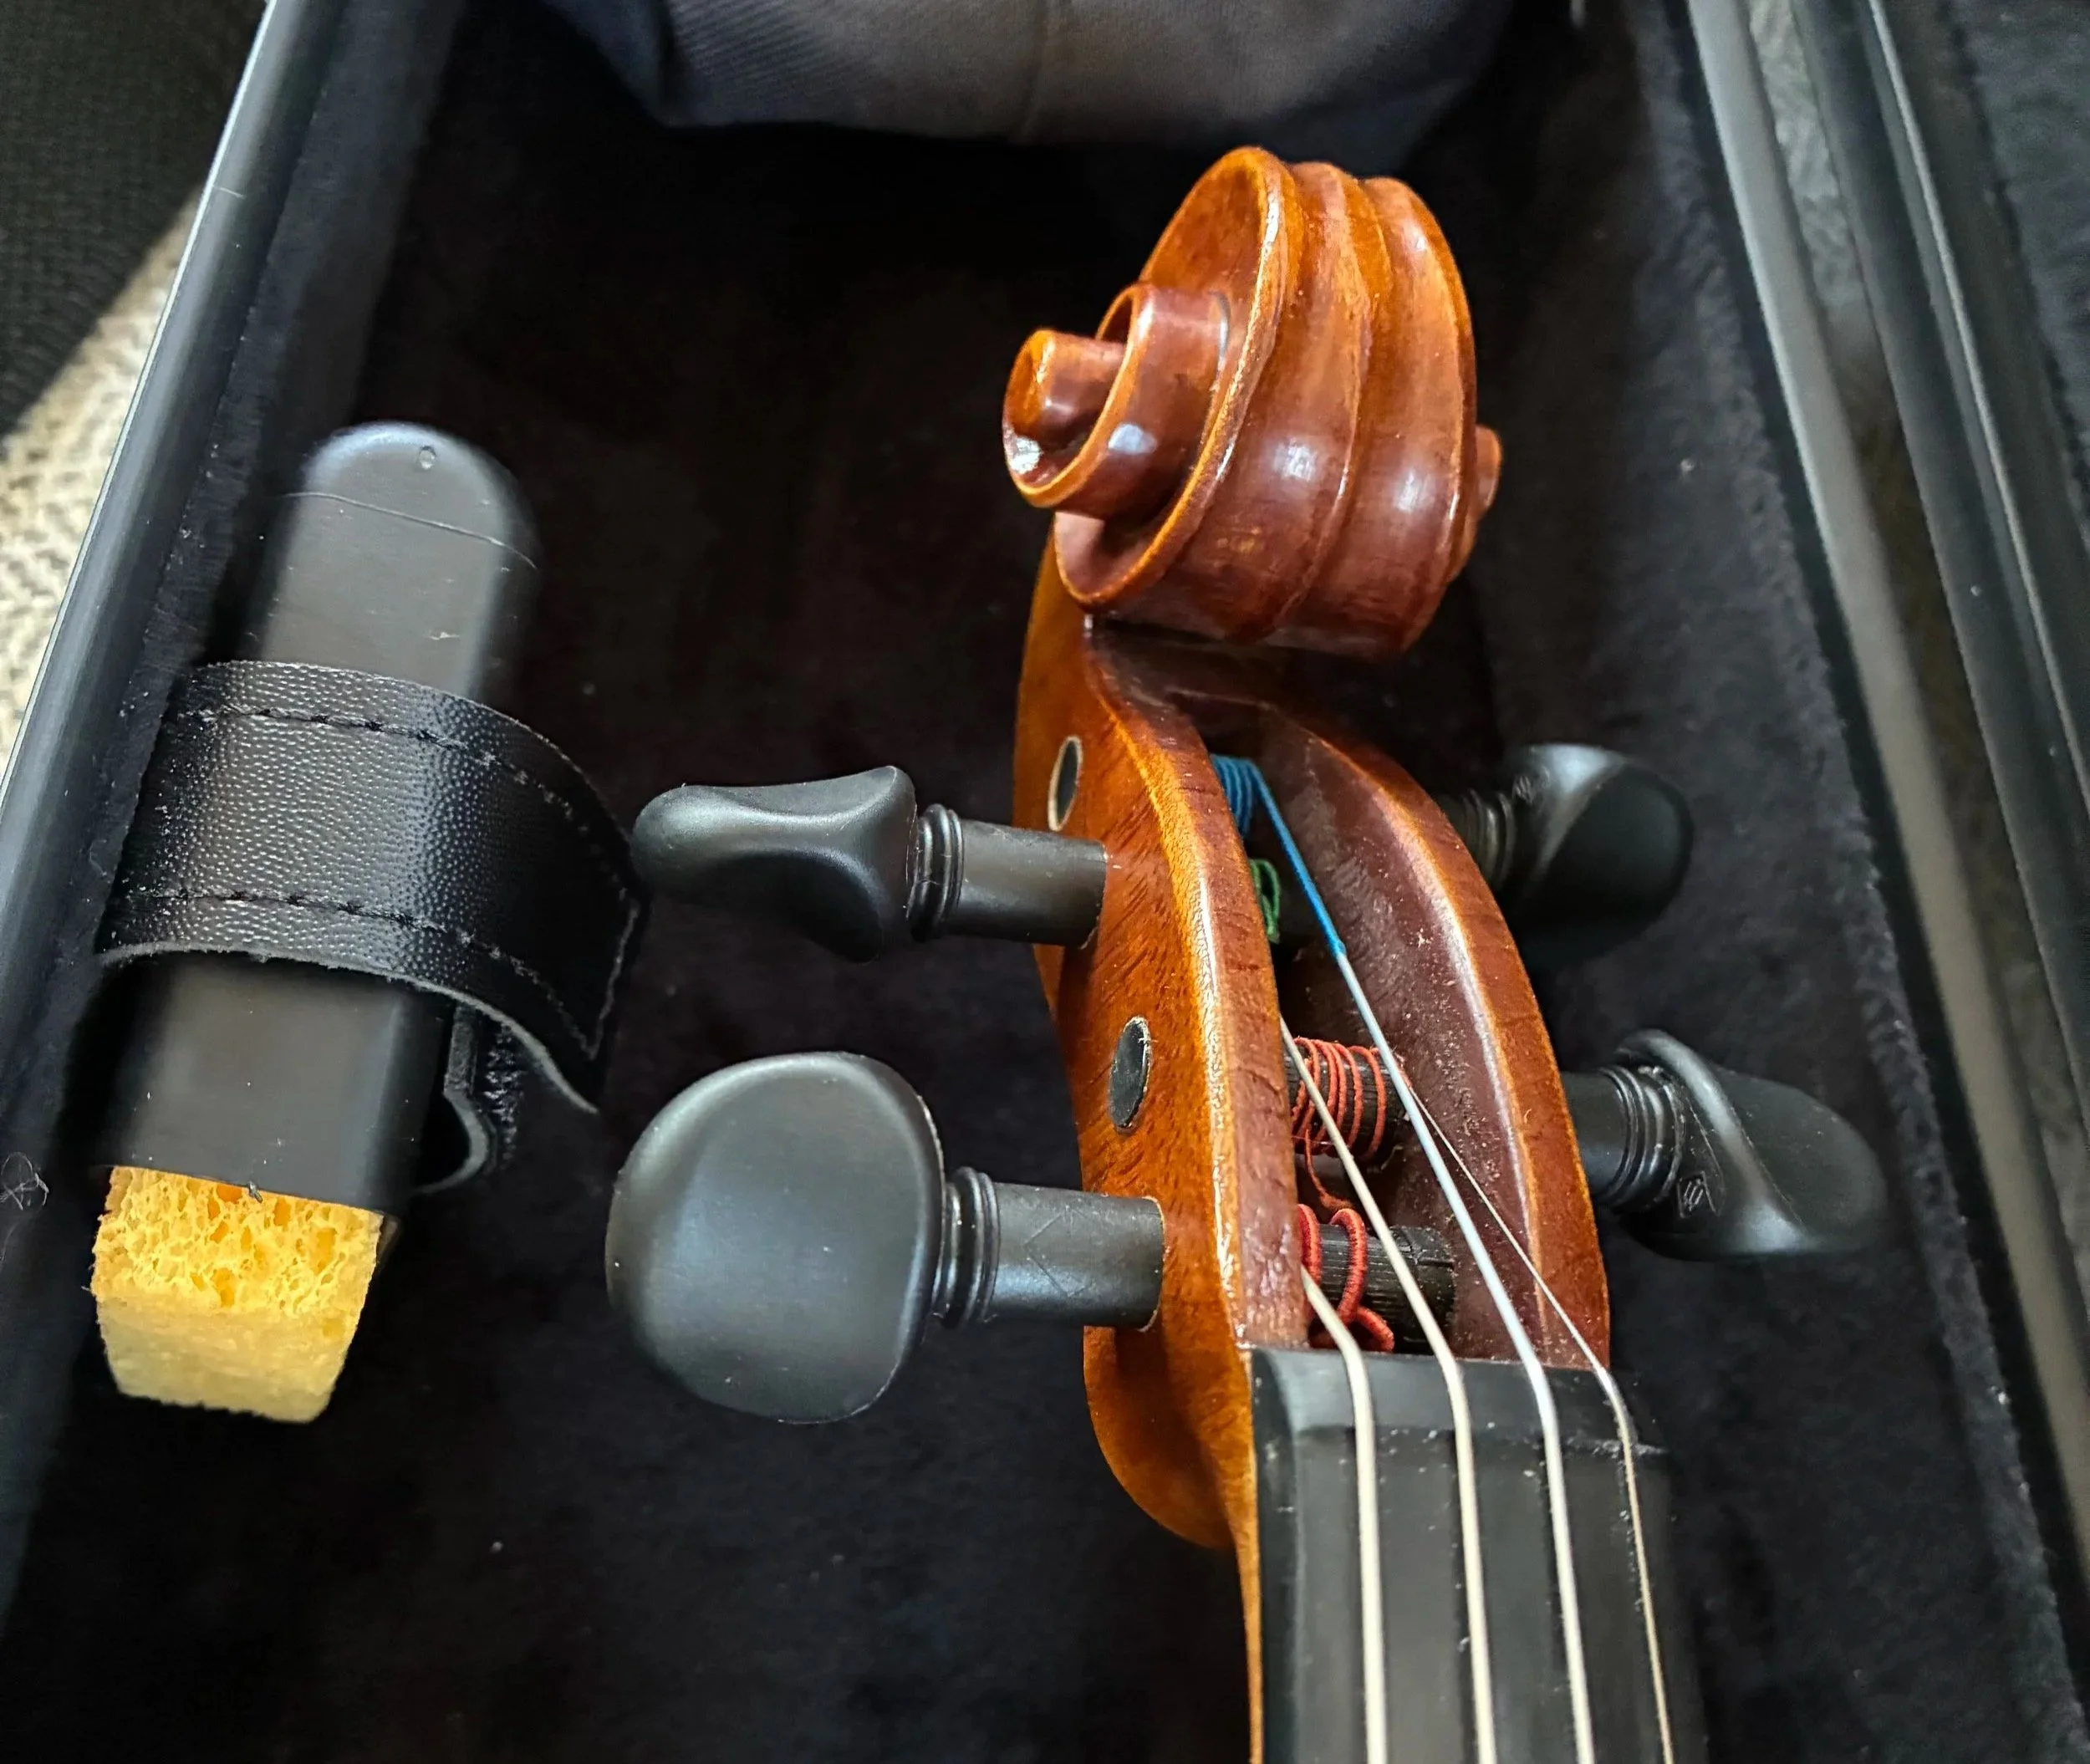
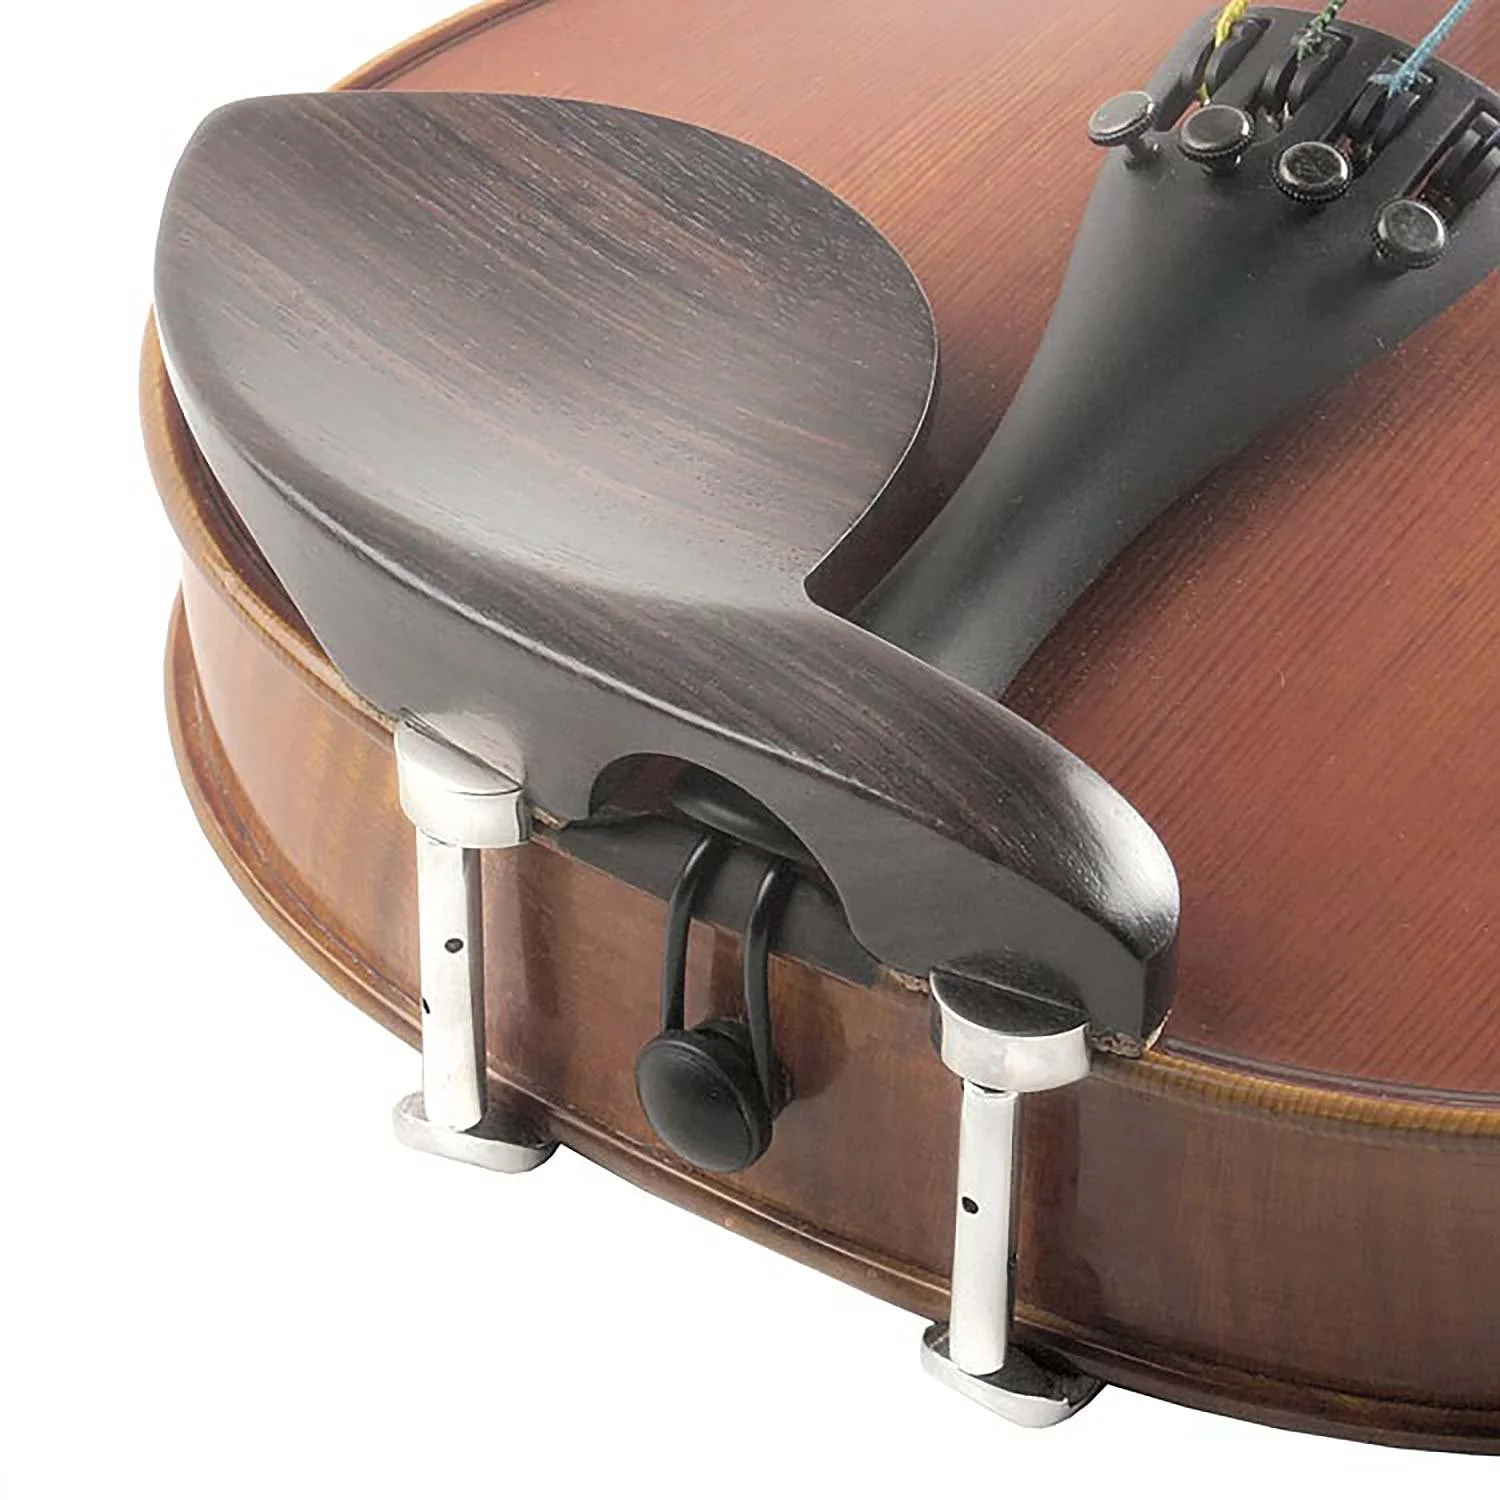
Even violins with well-fitted traditional wooden pegs are subject to changes in humidity that can make tuning difficult or downright frustrating sometimes. The answer to the age old problem of tuning is geared pegs, also known as perfection pegs or planetary pegs. Geared pegs look like traditional wooden pegs, but they work like the tuning pegs on guitars, making tuning a breeze. No more stuck or slipping pegs. No more loose strings from changes in weather. Tuning only takes a few seconds. You will rarely, if ever, need to use your fine tuners. I use geared pegs on all of my violins. I will never go back to traditional pegs! Not all violins come with the option for geared pegs, however, Kennedy Violins and Fiddlershop will install geared pegs on any violin before shipping them to you.
What should be included when you buy a beginner violin?
Most beginner violins should come as an outfit, which includes:
Violin
Bow
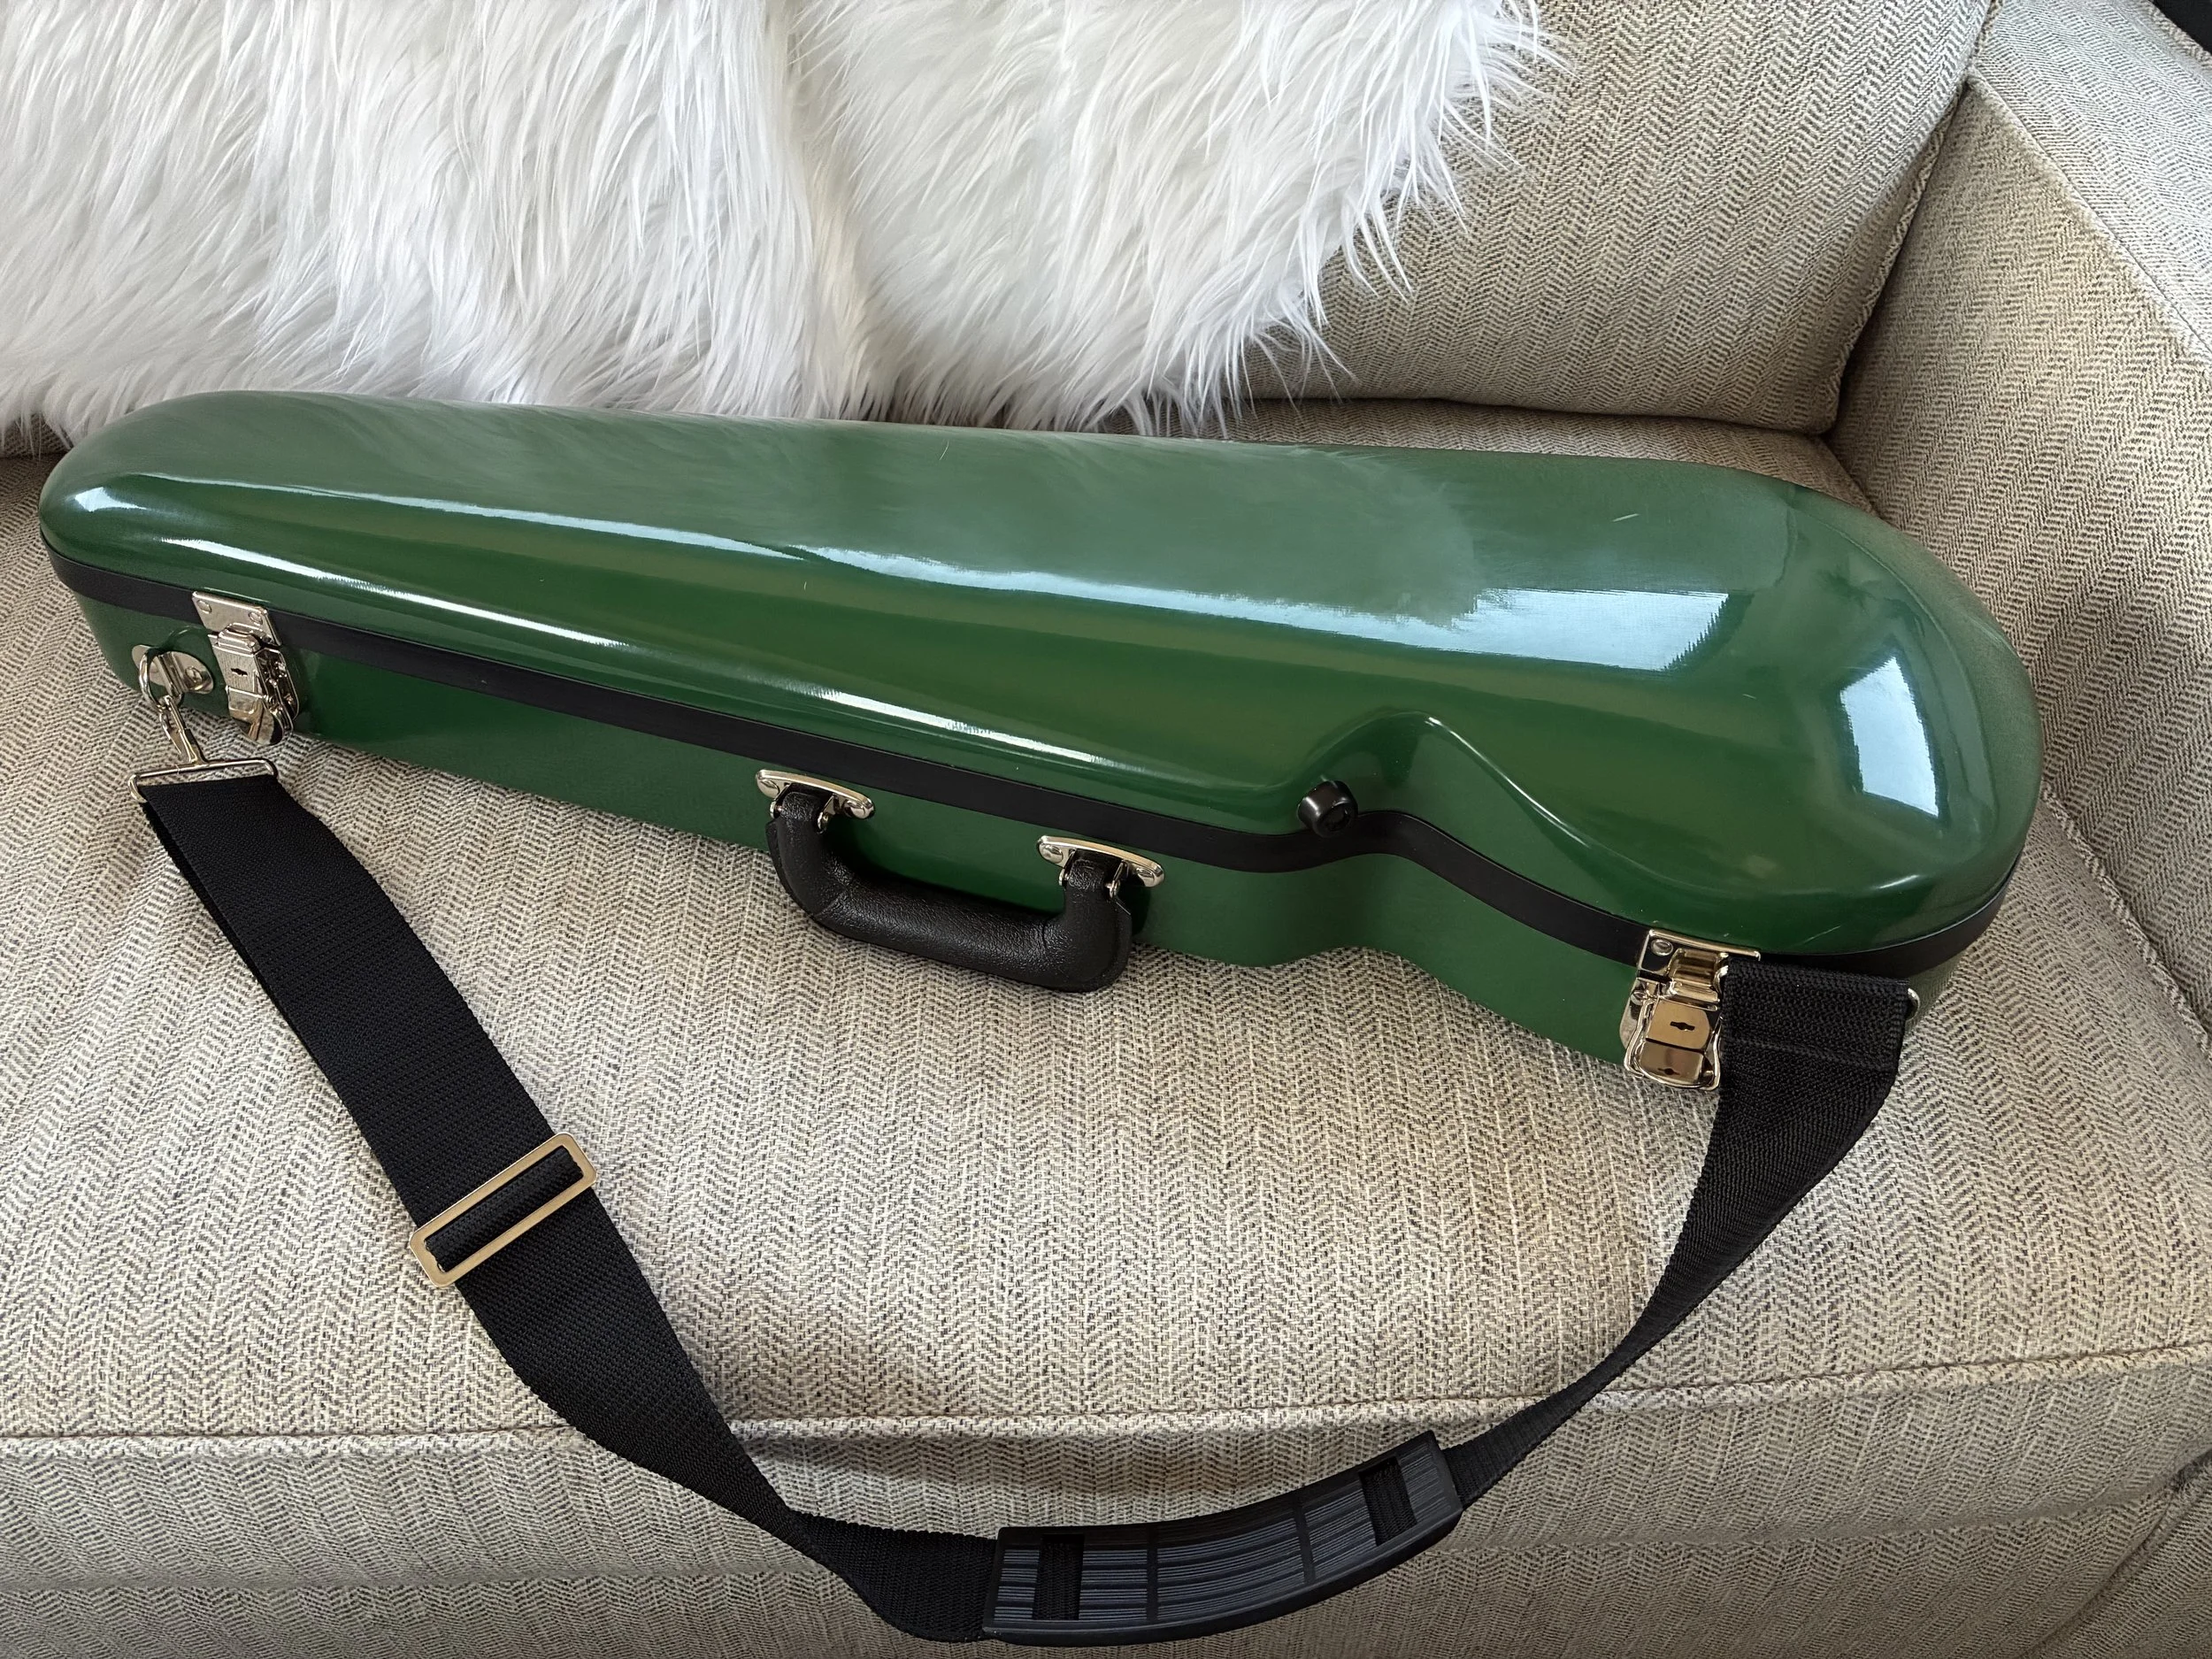
Case
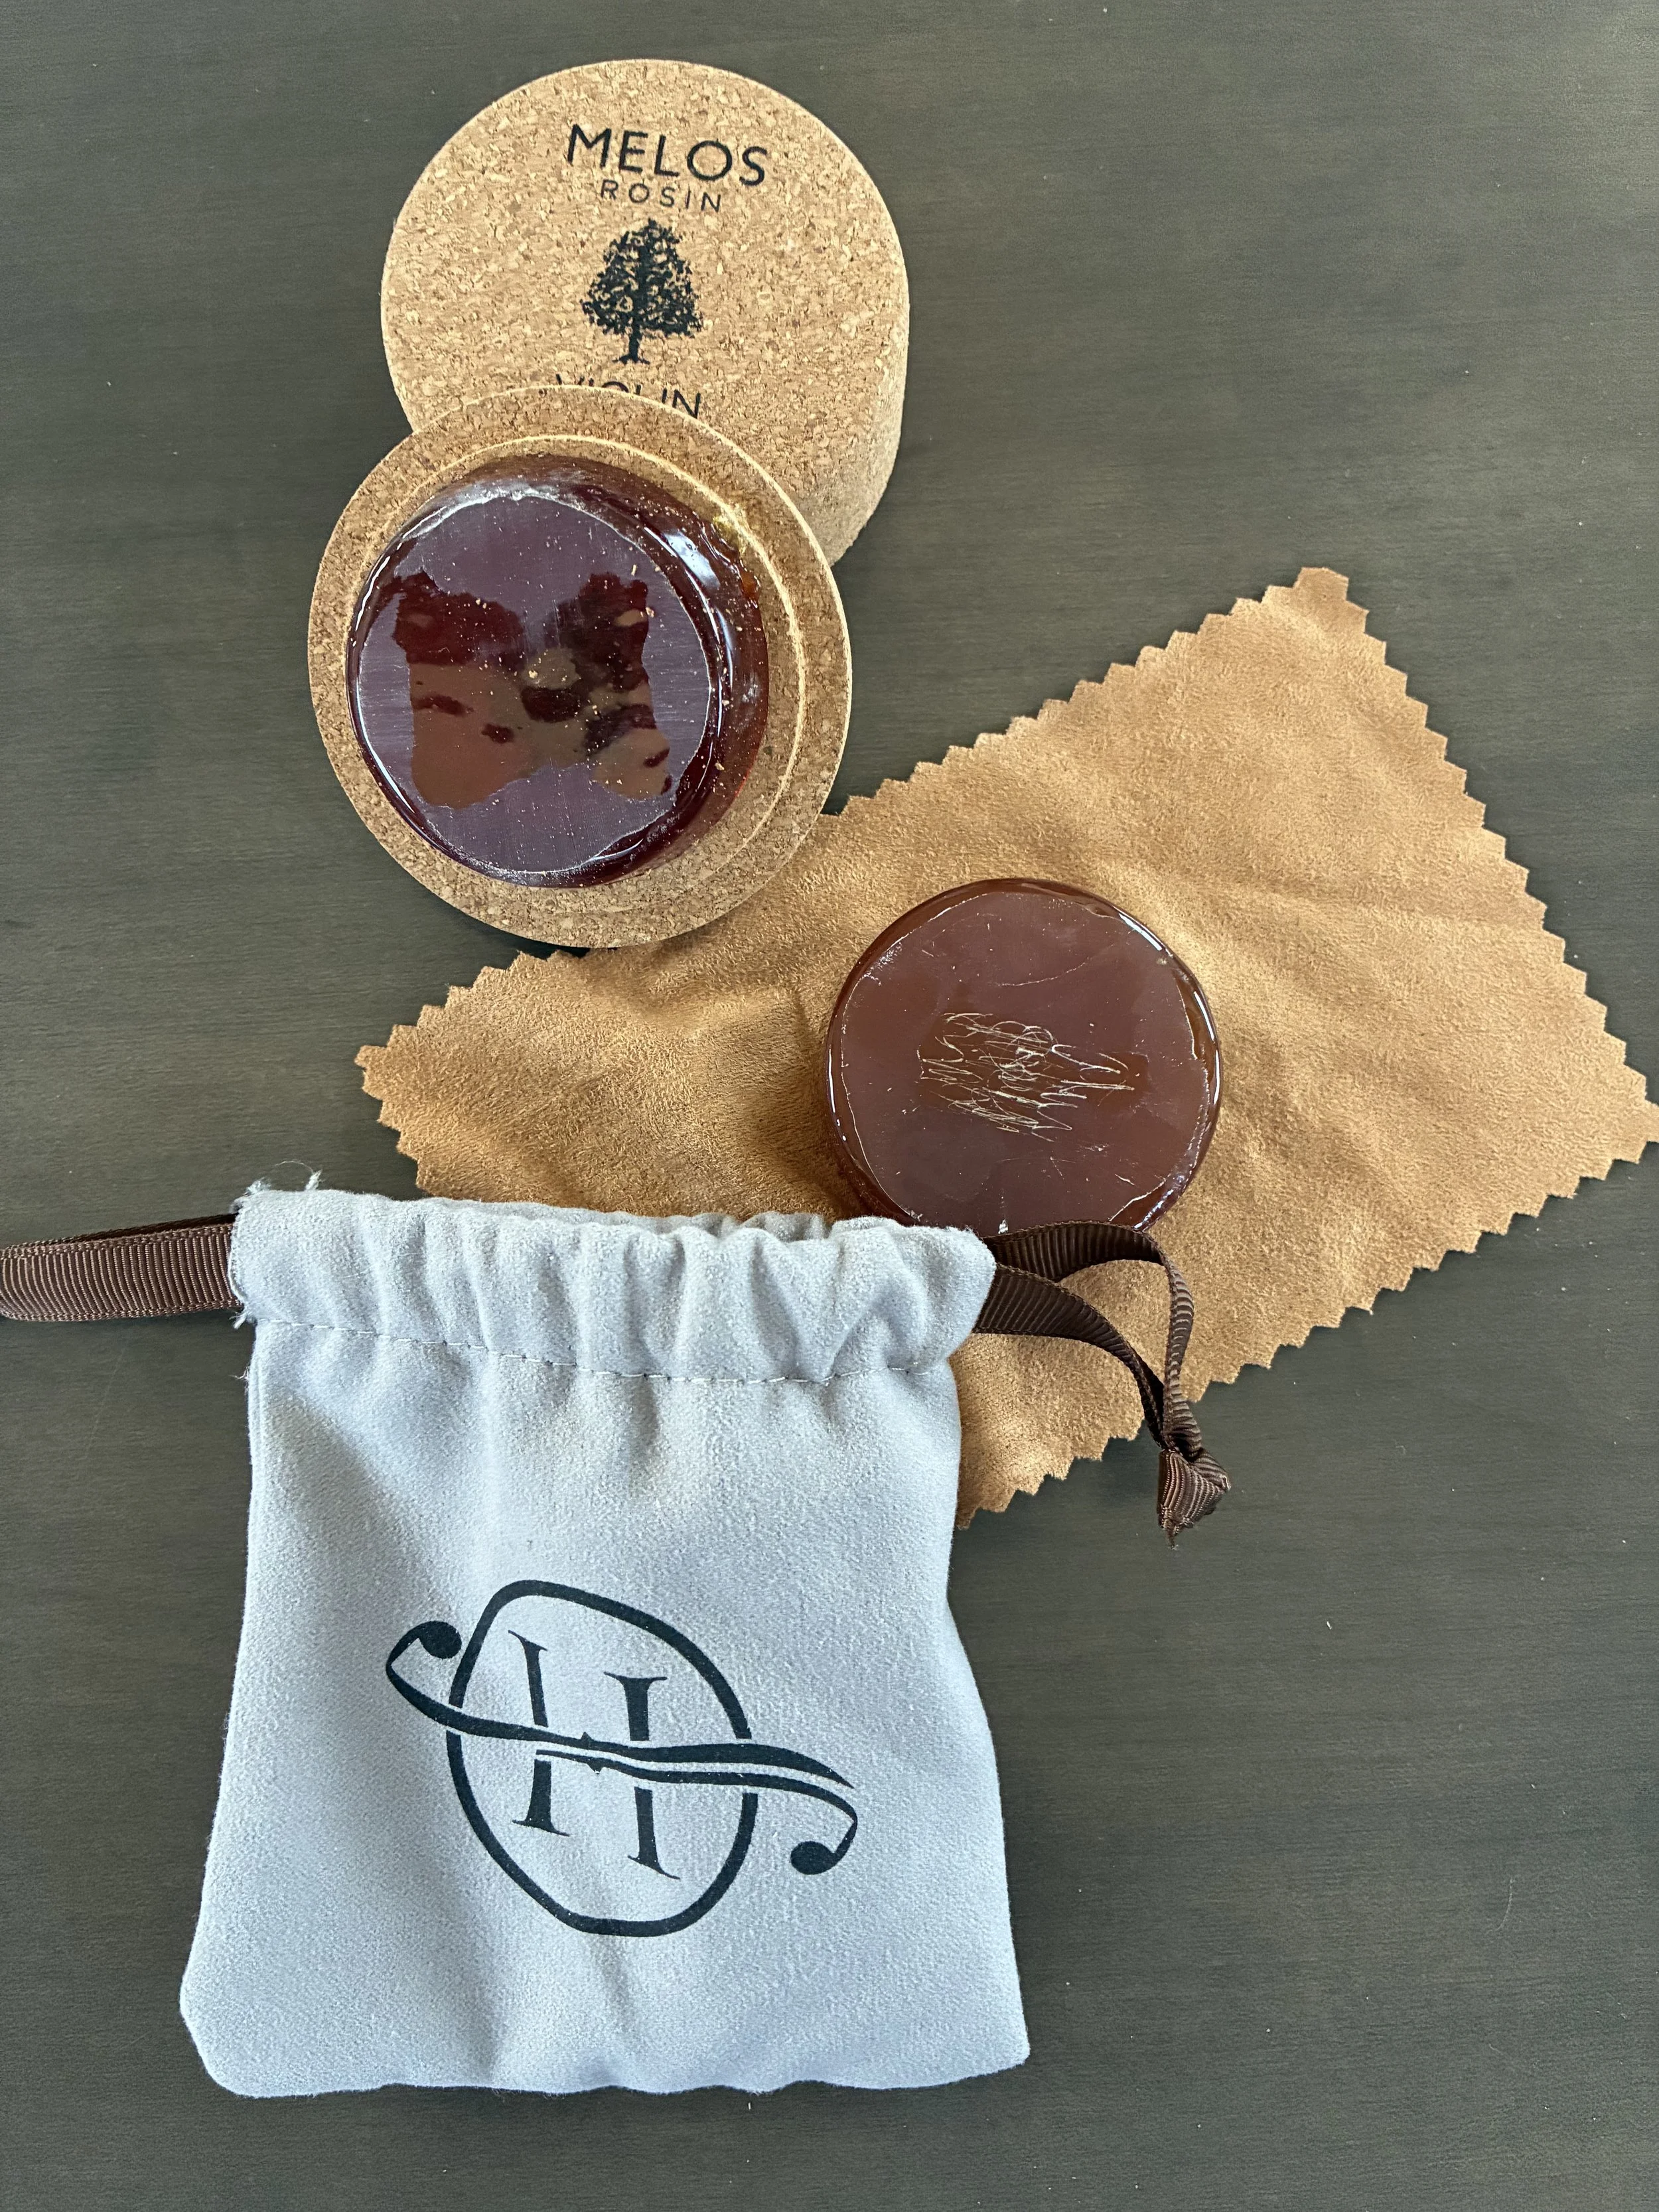
Rosin
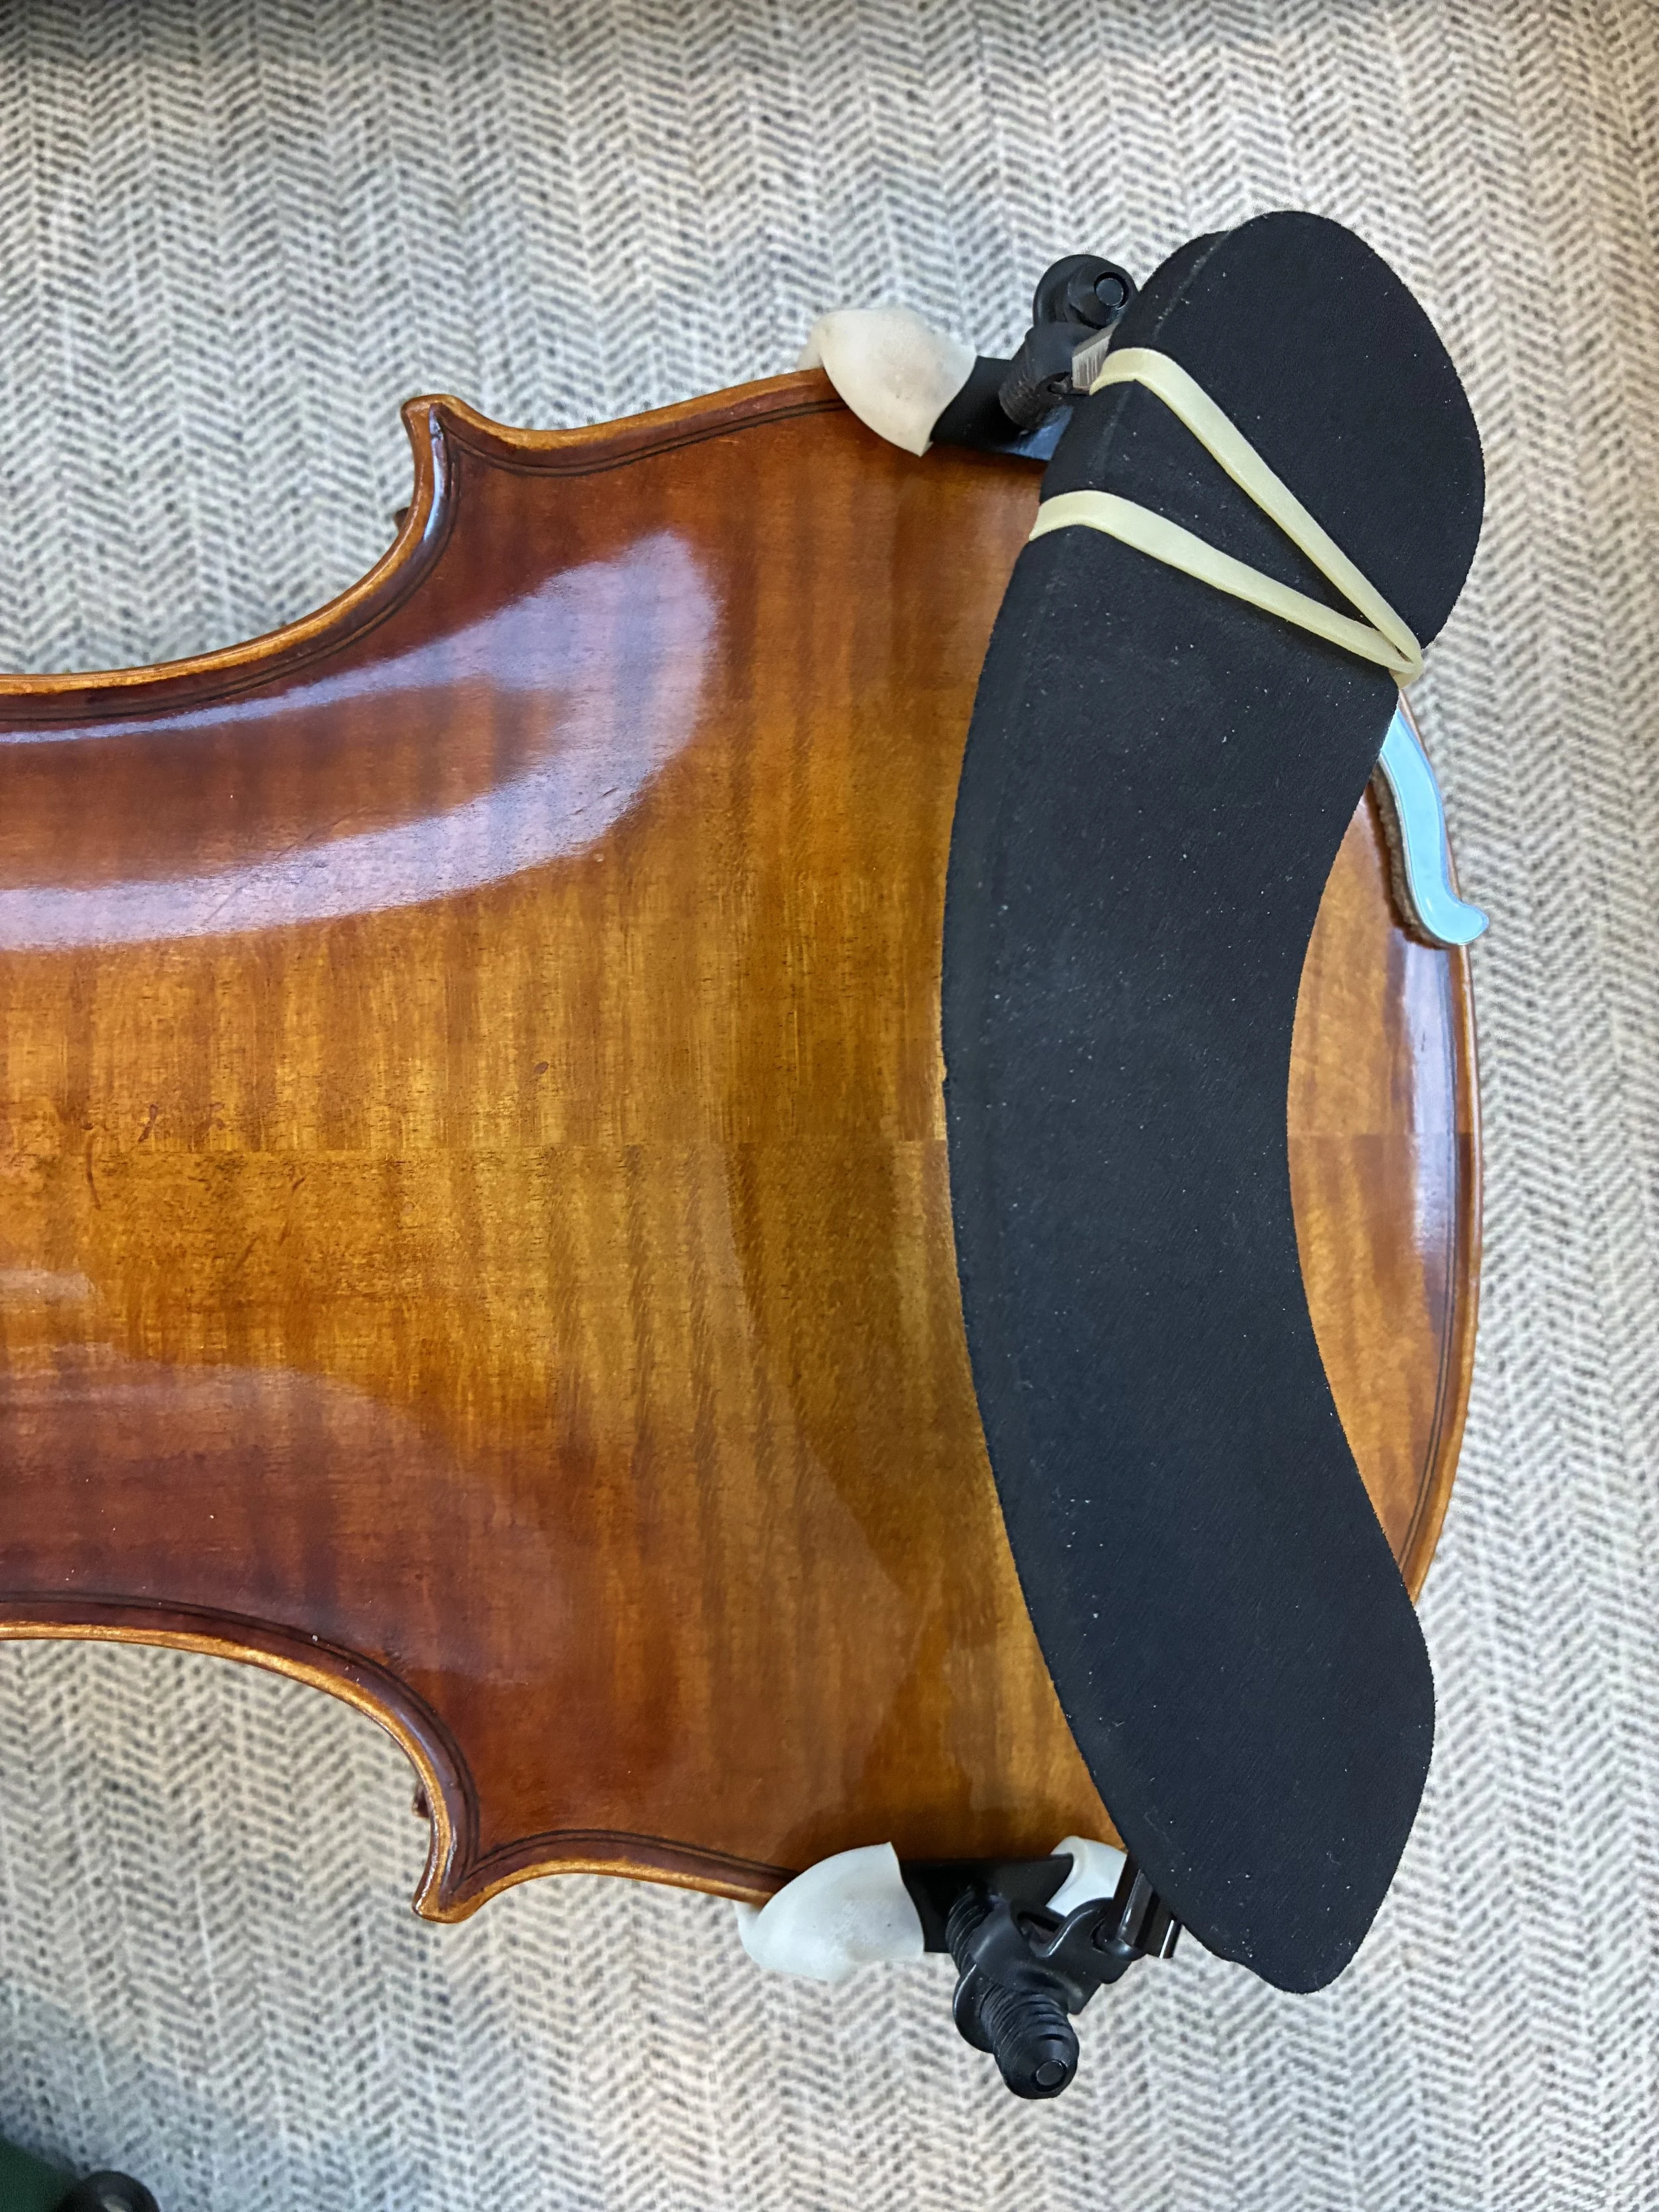
Shoulder rest
Many outfits come with a lot of other accessories like tuners and mutes.
If the outfit includes an extra bridge, run away! Replacing the bridge is something you want to leave in the hands of a trained luthier. Don’t worry though. When you buy a good quality violin, you shouldn’t have to replace the bridge unless you drop the violin and damage the bridge!
What makes a violin "advanced?"

Don’t let violin nomenclature confuse you. When looking at any any violin website, violins are divided into beginner, intermediate, advanced, and professional level categories. That doesn’t mean that you have to be an advanced player to handle an advanced level violin. It’s actually quite the opposite. Advanced violins make it EASIER to sound good. Give a beginner an advanced model violin and they will instantly have a better tone. On the other hand, certain beginner violins that are difficult to play will only sound good in the hands of a professional.
Can you buy an intermediate or advanced violin even if you’ve never played violin before? Absolutely!
How much money should I spend on a violin?
This is such an important question and one that people really struggle with (for good reason). You can always spend more on a violin, so where do you set your price limit? If you spend that extra hundred, are you really getting a better sounding violin? Or are you just paying for something that looks fancier?
First off, let’s talk about anything under $250ish which I consider VSO (violin-shaped-object) territory.
If you are unsure if you will stick with the violin and just want to “try it out,” don’t fall for cheap VSOs. I guarantee you, you won’t like it. Skip the hassle, spend $100 more dollars and get a violin you won’t have to keep messing with.
When you spend more money at a reputable violin store, you usually get a better sounding violin. But what’s good enough? I sum it up this way, the more you spend at first, the longer you will have before you need to upgrade.
Wait, you’re already talking about upgrading? Yes! If you stick with violin, trust me, you will want to upgrade. Good quality, beginner violins are great for learning, but eventually your technique will outgrow them.
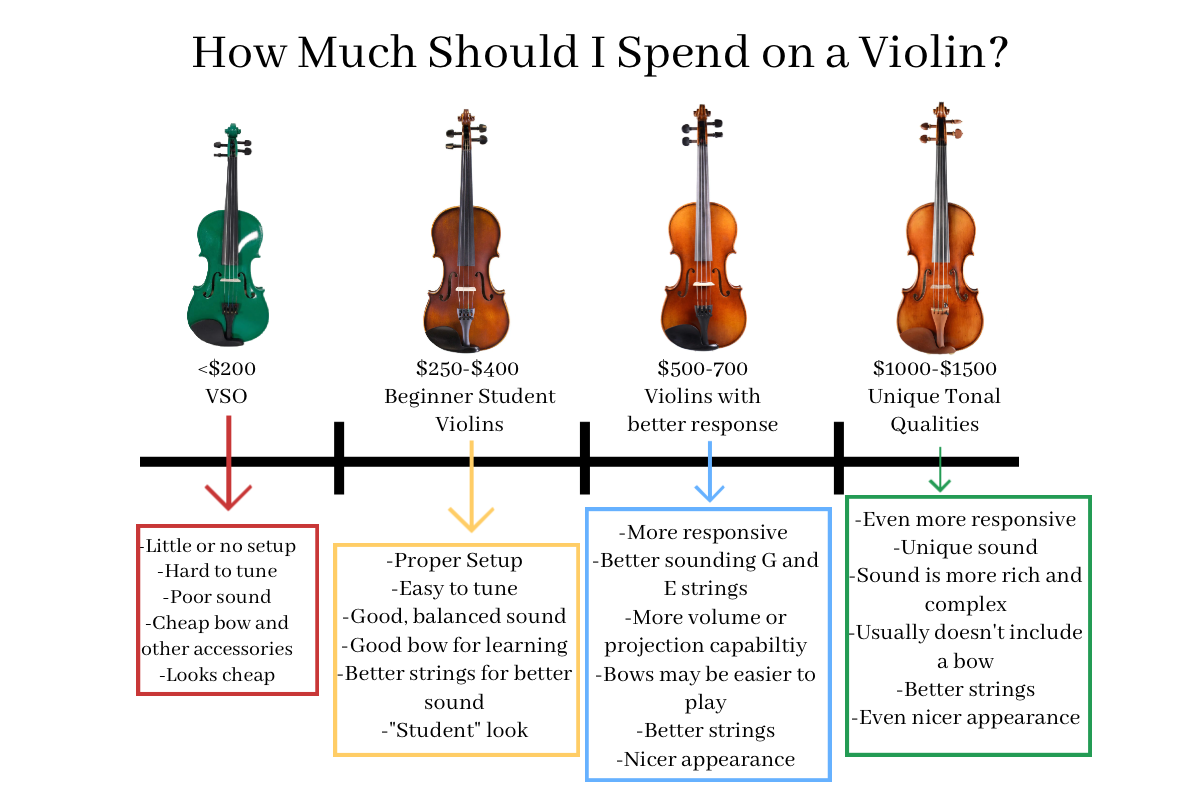
With that in mind, here’s how I break down cost ranges. This is based on someone practicing 30 minutes to an hour on average of a few days a week.
$250-$400 Violins in this price range are considered beginner student models. They are great for learning the basics. These violins often have a “student” look. The varnish is very shiny or very dull and the wood is pretty plain. If you start with a violin in this price range and practice regularly, you’ll probably notice you need an upgrade within 1-3 years (the higher the price, the later you’ll want to upgrade).
$500-$700 If you’re a beginner and buy a violin in this price range, you’ll enjoy a more responsive sound (the violin or bow aren’t sluggish or slow to respond to your inputs). The sound is also usually less blatty and more rounded. These violins have a nicer appearance, more tasteful varnish, and wood with interesting markings. If you start in this price range, you probably won’t think about upgrading for 3-5 years.
$1000-$1400 If you’re a beginner and buy a violin in this price range, you’ll enjoy an even more responsive sound. Tonal qualities often get sweeter, less shrill, more focused, less muddled, etc. These violins look more professional. The wood may be more beautiful and the varnish will be even more tasteful. You’ll start to see very unique looks in this price range, some violins may be more blonde, others darker. You may be perfectly happy never upgrading or upgrading in 5-10 years.
$1500+ Violins in this range often have very unique tonal qualities. For instance, one violin may have a very warm sound, while another of equal quality and price is very bright and focused. I usually tell beginner students to buy violins under this price range. As you learn the basics, you’ll understand what tonal qualities you like. Then when you have some skills, you’ll be able to try out violins and pick a violin that truly speaks to you. As violins get more expensive, you’ll notice beautiful wood, lovely antiqued varnishes, or other unique appearances.
TL;DR
If you just want to try violin, $250-$300 will be good enough.
You want something a little nicer sounding than the very basic setup, shoot for violins in the $400-500 range.
You don’t mind spending a little more if it means a significant improvement in sound and appearance. Go for $500-$1000
You want a violin you don’t have to worry about outgrowing anytime soon. $1000-$1500
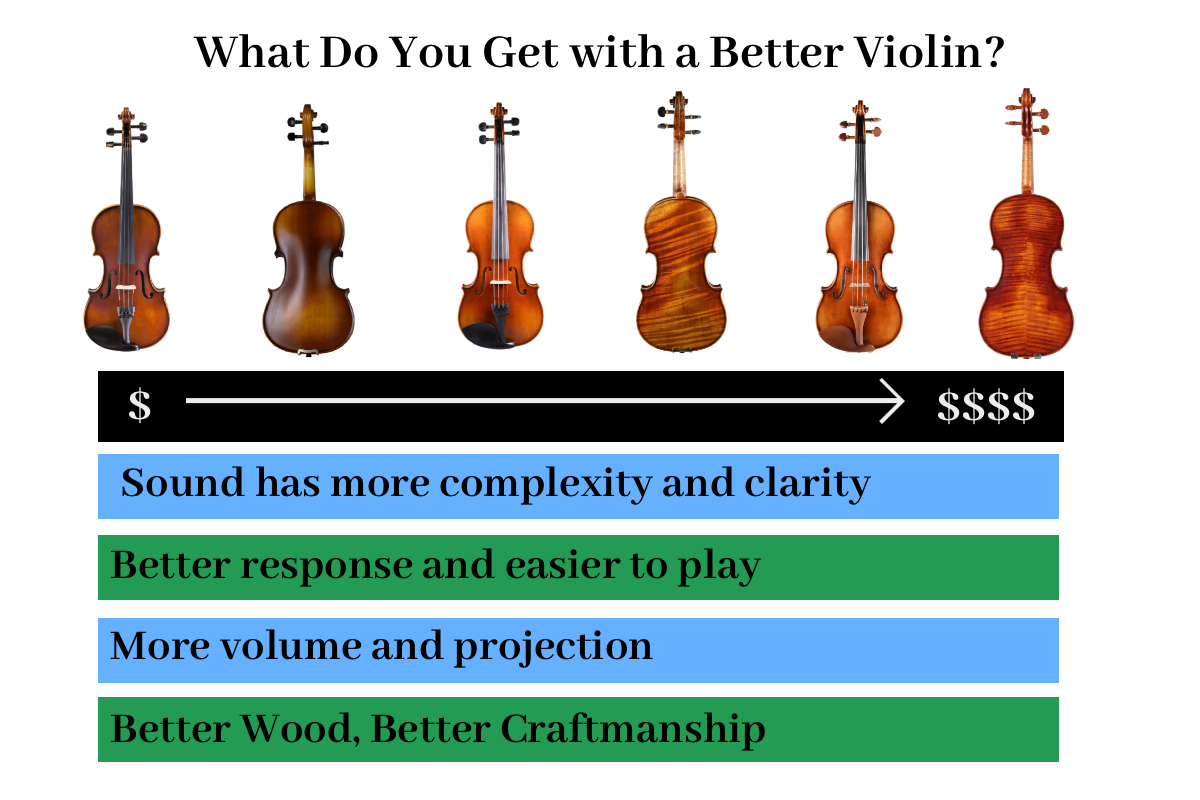
What does more money get you when buying a violin?
Are more expensive violins worth it? When buying from trusted violin shops, the more you pay, the better violin you’ll get. But what makes a violin better? As you increase price and quality, the following items will improve:
Clarity of tone: The sound will get more pure and clear without extra scratchiness
Complexity of tone: Think about the scent of a home grown rose vs. store-bought rose. That’s complexity.
Better response: When a violin or bow is responsive, it means when you ask it to do something, it responds immediately. Better violins are less sluggish or slow to respond.
Easier to play. Better response means it’s easier to play. Better violin can also take more weight and more nuance.
More volume: Better violins aren’t just louder, they have full tones that equate with more volume.
More projection: The sound will carry more and sound clear to someone further away from the violin
Better craftsmanship: The better the violin, the better it’s made
Better wood and more professional appearance: As you increase price, violins will look less and less like a student violin and more like a professional violin. Better wood not only means better tone, it means more beautiful flames (the design in the wood) and more tasteful varnishing.
What are the best violin brands under $500?
To name a few, the best violins for under $500 would be Tower Strings, Bunnel, Fiddlerman OB1 and Apprentice Violins, Antonio Giuliani, Franz Hoffman, Klaus Mueller, and Eastman violins.
Where you purchase a violin matters
Some of the violins above are sold exclusively at certain violin stores. However, some brands you will see at various online shops. Be wary when purchasing a violin from any store other than a dedicated string shop or luthier. A good set-up is very important. I do not recommend purchasing violins from big box stores, Amazon, Wal-Mart, Guitar Center, etc. If a store sells everything, it’s not going to specialize in strings (or it sources out its set-up work). Either way, skip that hassle and purchase from a trusted company.
It’s great to start with local luthiers and strings shops. If that’s not possible, I recommend the following online shops (in no particular order): Kennedy Violins, Fiddlershop, Shar Music, and Southwest Strings.
My two top recommendations for online stores are Fiddlershop and Kennedy Violins. These stores ship anywhere, but they also have brick and mortar locations as well if you want to try out violins in person. Fiddlershop is in Florida, and Kennedy Violins is located near Portland, Oregon. There’s a few reasons why I recommend these stores.
Great return policies. Not that you’ll need it, but it gives you good peace of mind.
Trade-up programs. When you’re ready for an upgrade, get a percentage off your new violin when you trade in your old one (the old violin must be from their store).
Great customer service. Remember supply shortages 2020-2021 when everyone suddenly had time to play violin? These companies consistently delivered great customer service when other companies were dropping the ball. That says something!
In-house set-ups. They make sure your violin is set-up correctly right before it’s shipped to you.
Ability to customize your violin before it’s shipped. Both companies will install geared pegs on your violin before it’s shipped (makes tuning so much easier). This is an extra, non-refundable charge.
Those are all things you won’t get when you order on Amazon or any other generic box store!
What are geared pegs and why do I need them?
Learning violin is all about muscle memory and ear training. When you put a finger down, your brain needs to associate that position with a certain pitch. That’s how you learn to play in tune! This means it’s imperative to tune your violin every time before you play.
This isn’t a big deal with quality violins. Most violins will come with well-fitted traditional pegs. Traditional pegs are just a wooden peg that fits into a hole. If you know anything about wood and humidity, you know where this is going. Wood swells and contracts with temperature and humidity changes making those pegs alternatively slip or stick with weather change. This doesn’t mean that they will be slipping and sticking all the time, but traditional pegs can be a little bit tricky when it comes to tuning. They make big adjustments and for beginners, it can be hard to get them in the general range of the pitch.
The solution? Geared pegs! These work like guitar pegs. They turn smoothly with no slipping or sticking. They’re so easy to tune you don't even need fine tuner. And they keep the violin in tune longer!
A geared peg upgrade will add about $200 to the price of your violin (that includes the pegs and the installation). Geared pegs look the same as traditional pegs.
Geared pegs on beginner violins are a great idea if:
You don’t have a lot of musical experience
You’ve heard horror stories about tuning and you’re a little nervous
You’re teaching yourself, or learning via the internet
You live in an area with wild, sudden changes in weather
You’re buying the violin for a child
You just don’t want to bother spending a lot of time tuning everyday.
Don't let this scare you away from traditional pegs. All of the violins I recommend have good working traditional pegs, but if you just want it to be a little easier, geared pegs are amazing.
I have years of tuning experience, but I still put them on all of my violins!
What are the best violins by price range?
$250-$350—Tower Strings Entertainer and Rockstar, Franz Hoffman
$350-$450—Bunnel Pupil, Tower Strings Legend, Tower Strings EasyTune, Fiddlerman OB1
$450-$550— Bunnel Premier, Bunell G2 and G1, Fiddlerman Apprentice, Antonio Giuliani Etude
$550-$650—Antonio Giuliani Premier and Primo, Fiddlerman Concert
$650+—Louis Carpini, Fiddlerman Artist
Top 10 Beginner Violins

If you want a basic overview, here are my top ten picks for the best beginner violins, in order of ascending price.
Best Beginner Violin Reviews
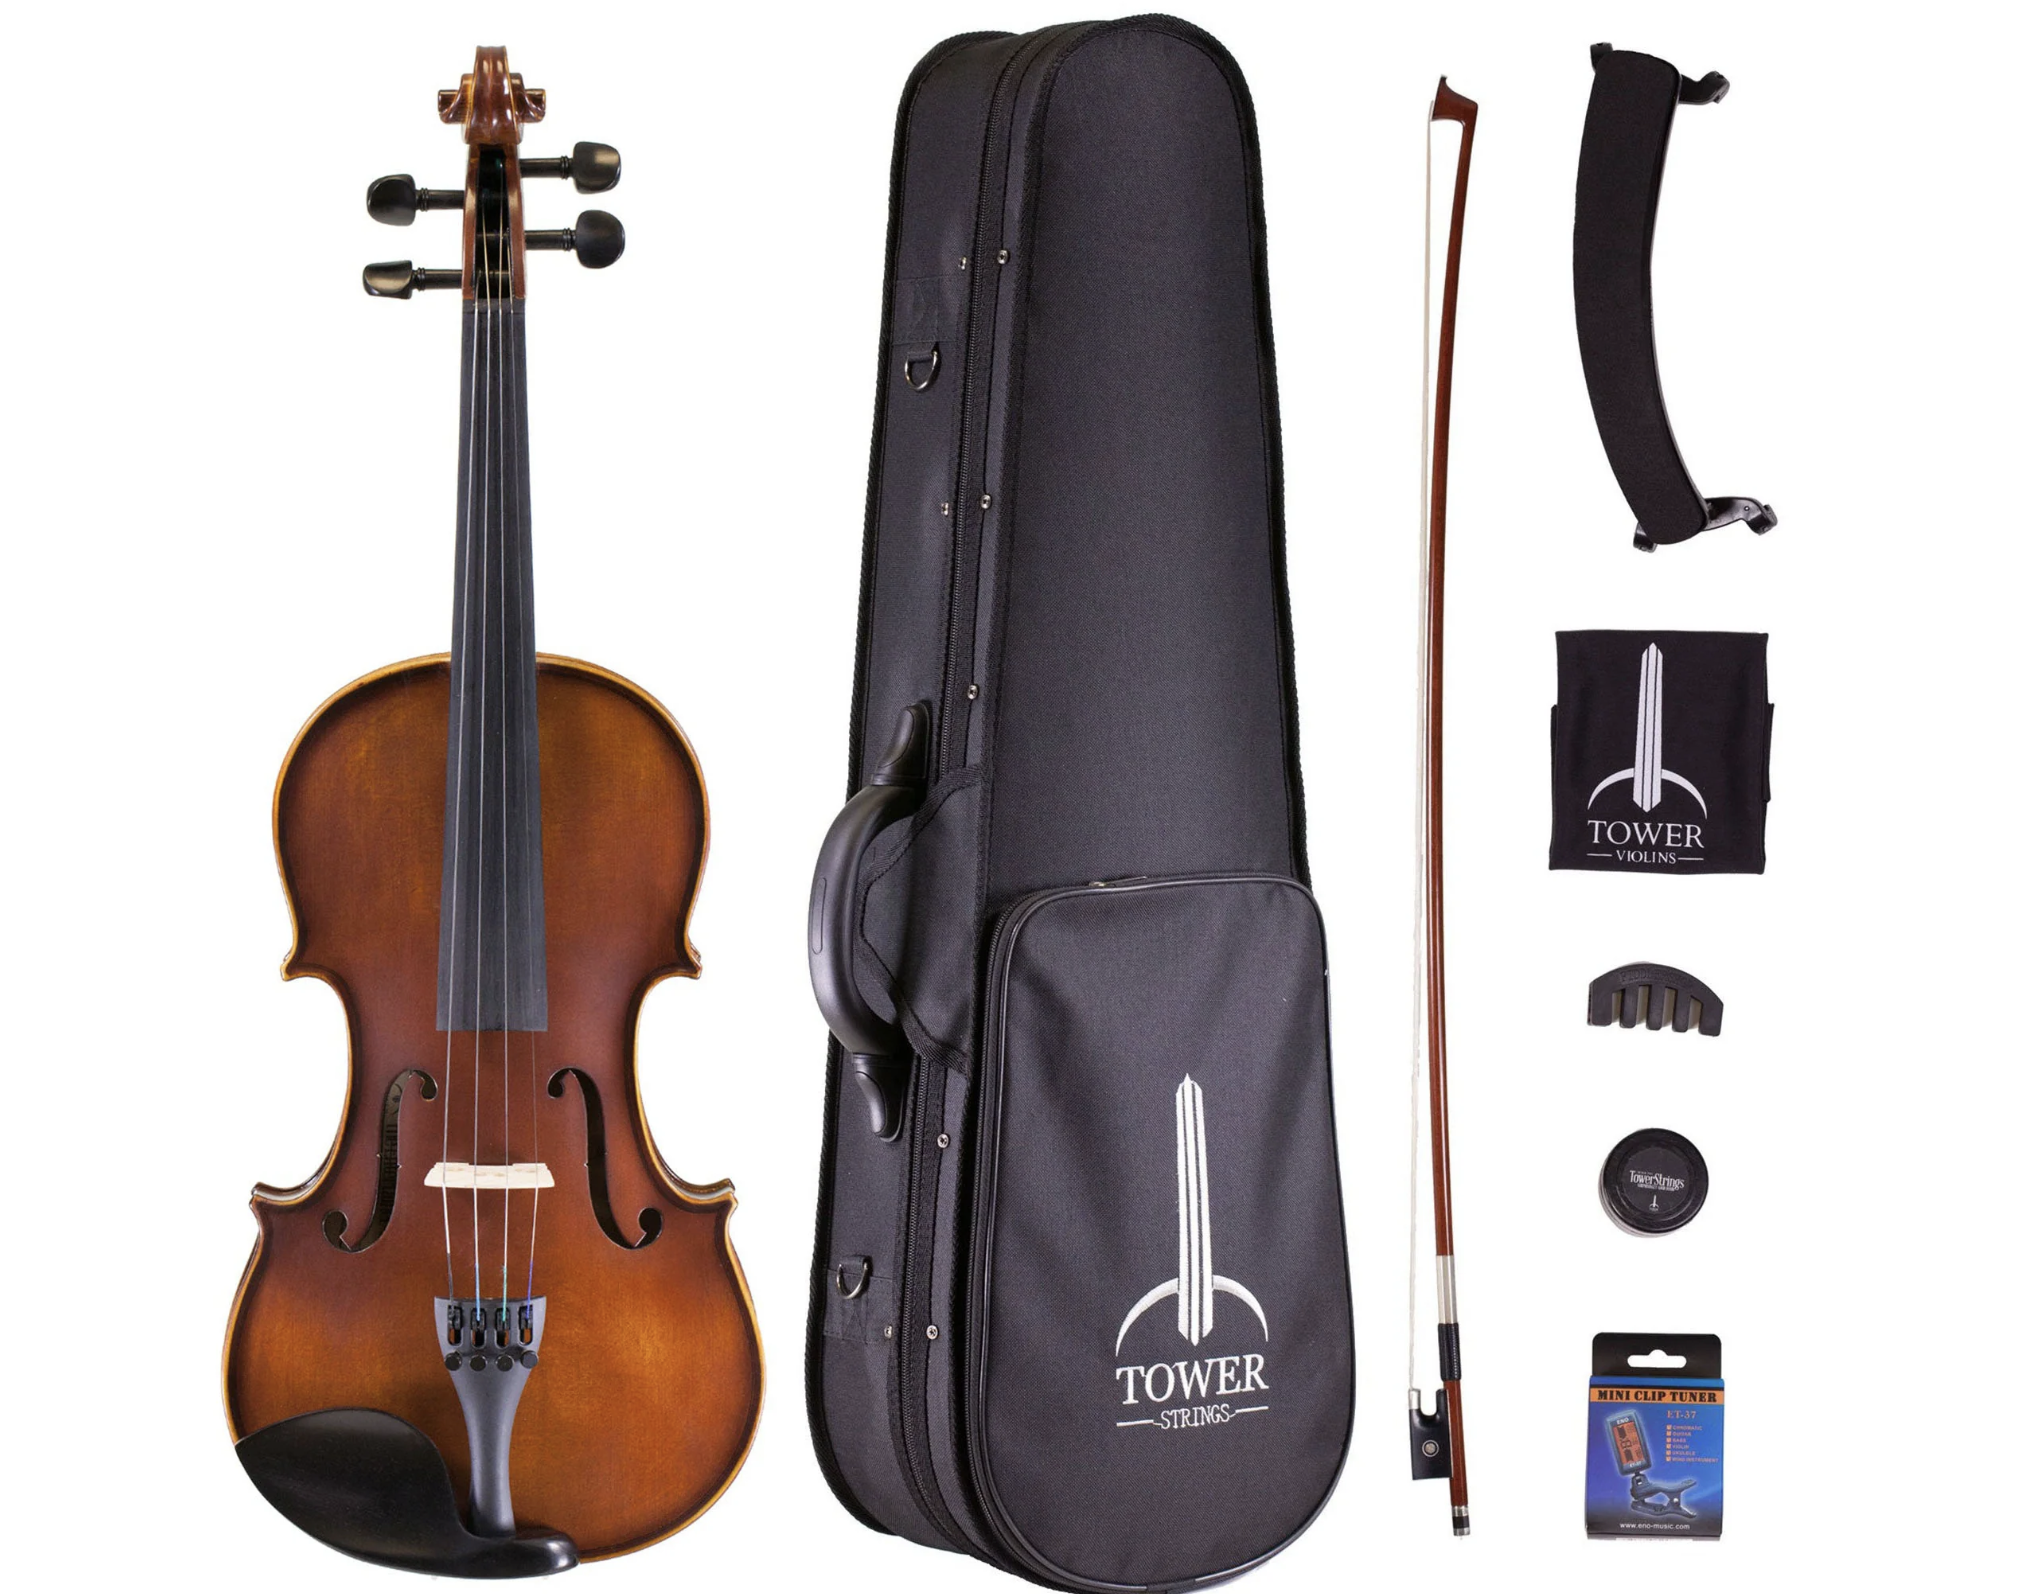
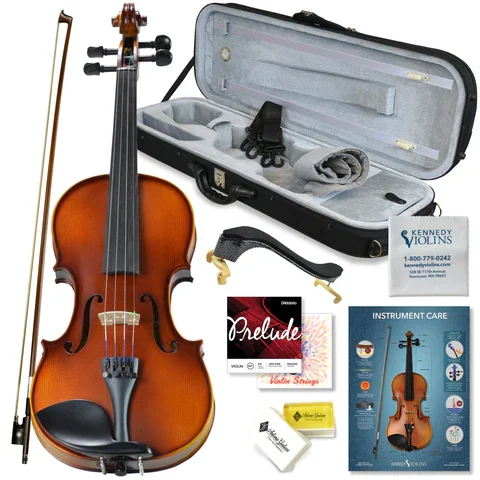
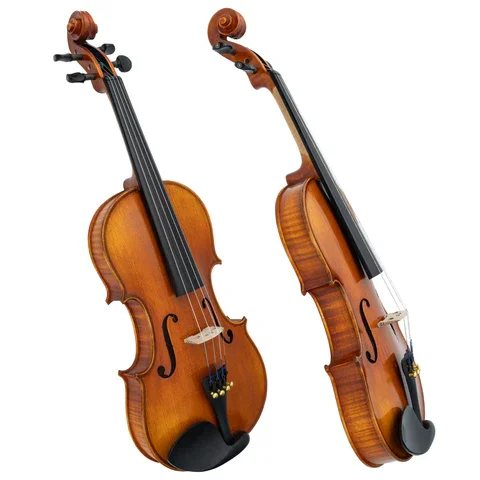
Most Affordable Violin for Beginners: Tower Strings Violins
Tower Strings offer three entry-level violins: The Entertainer, the Rockstar, and the Legend. These violins surpassed all of my expectations for a beginner level violin. They are by far the cheapest non-VSO violin that I would recommend and are great for getting started. They have a beautiful finish and little touches like mother of pearl inlays on the pegs and tailpiece give the violin a high-quality appearance, with a low price. Their wonderful tone and ease of playability make these violins my top pick for beginner violins.
The outfits come with brazilwood bows and standard entry-level strings but I would highly recommend upgrading to the Fiddlerman carbon fiber bow and the Fiddlerman synthetic core strings. The strings were the best beginner strings I have ever played—even tone and bright, complex sound. The bow made playing very easy and forgiving (not always the case with beginner violins). When you click “add to cart” you will have the option to upgrade.
As with all Fiddlershop violins, your violin is inspected and played by a luthier before being shipped so your violin is ready to go when you get it. This is big, and it’s not something you are going to get when ordering a violin form a mega online store.
Which one should you get? With this brand of violins, you can rest assured that the more money you spend, the better violin you will receive. The Entertainer was wonderful and would suit any beginner just violin. I noticed an increase in tone quality with the increase in price of the other violins, as well as more beautiful wood on the back. If you want a little bit better sound, spring for the Rockstar or Legend.
If you want to make tuning really easy on yourself, Fiddlershop now sells the Entertainer EasyTune. The EasyTune comes with geared pegs already installed which makes tuning so much easier. (I have geared pegs installed on my violin and I’ll never go back to traditional pegs.) Fiddlershop is one of the only online retailers that will install geared pegs on any of their violins before they’re shipped to you (you just have to ask for it). But with the EasyTune, you can purchase the violin with geared pegs already installed. Win win!
Want to really save money? Fiddlershop often has discounted B stock violins for sale. They are perfectly playable with minor cosmetic defects. Check out the discounts here!
If you’re practicing consistently, this violin will last you a year or two before you’re ready for an upgrade.
Pros

Most affordable beginner-level violin that is NOT a VSO
Easy to tune (especially if you get the EasyTune)
Nice finish
Easy to play
Good tone
Comes with everything you need to play
Great customer service
Cons
I’m not a big fan of the tuner. If fact, it’s really easy change the Hz setting and tune your violin to the wrong pitch (even though the tuner says green).
Shoulder rest is great for starting. You’ll probably want a different, or more durable one eventually.
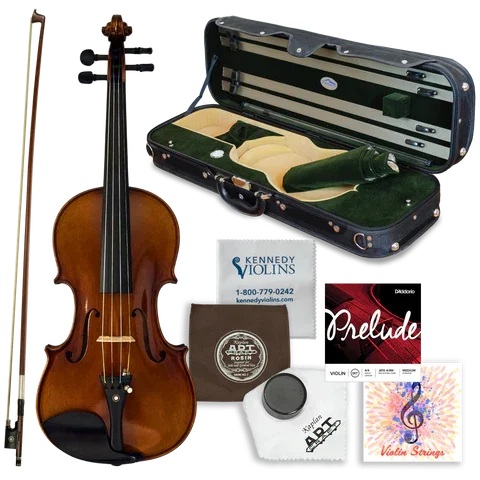
Bunnel Pupil Violin: An Upgrade in Appearance and Better Case
If you want to get started for as cheap as possible, Tower Strings is the way to go. But if you’re okay spending about $70, you can invest in the Bunnel Pupil violin and get an upgrade in sound, appearance, and big upgrade in accessories.
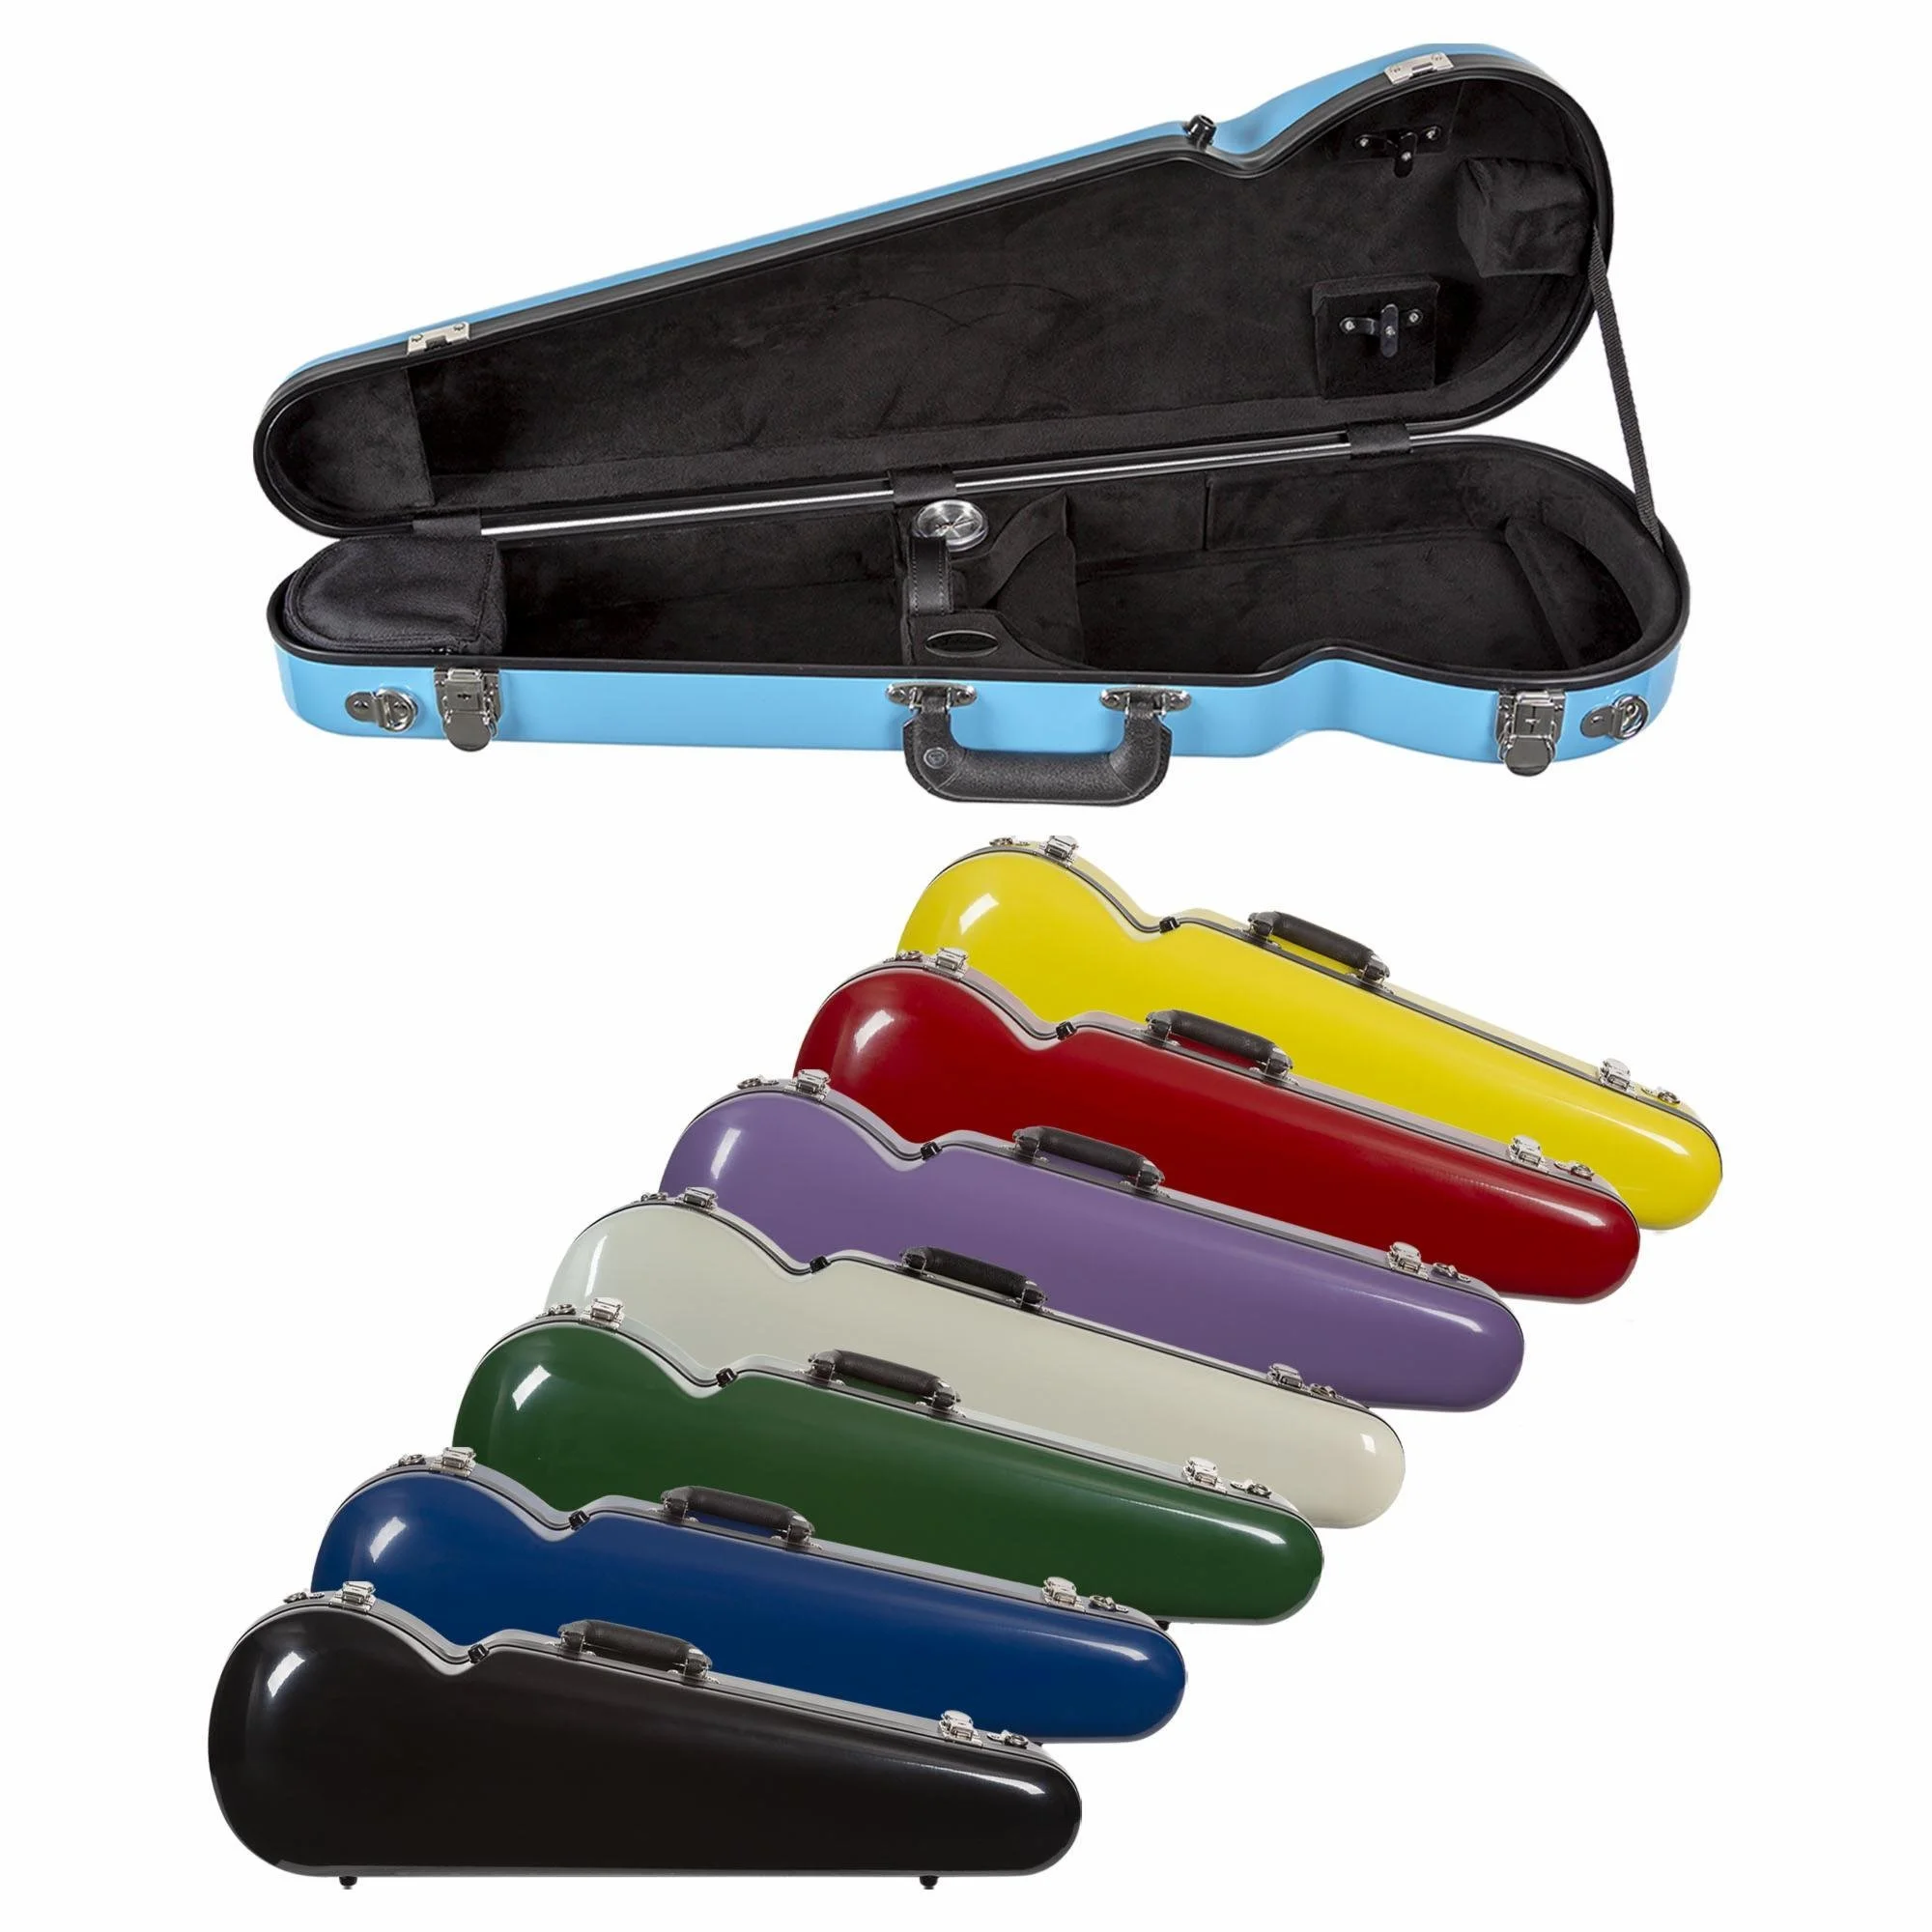
I love the dark varnish of the Bunnel Pupil violin. For the price, it’s the least “student” looking violin in that “beginner violin” price range. It’s got a great sound and improved response. For the price, you also get a big upgrade in accessories, like an oblong case which means a place to put your shoulder rest! Okay, I know that doesn’t sound like much, but trust me, it’s a real problem to figure out where to put that shoulder rest when it won’t fit in your case, especially for traveling. It means so much to keep all of your accessories with the violin, especially for kids!
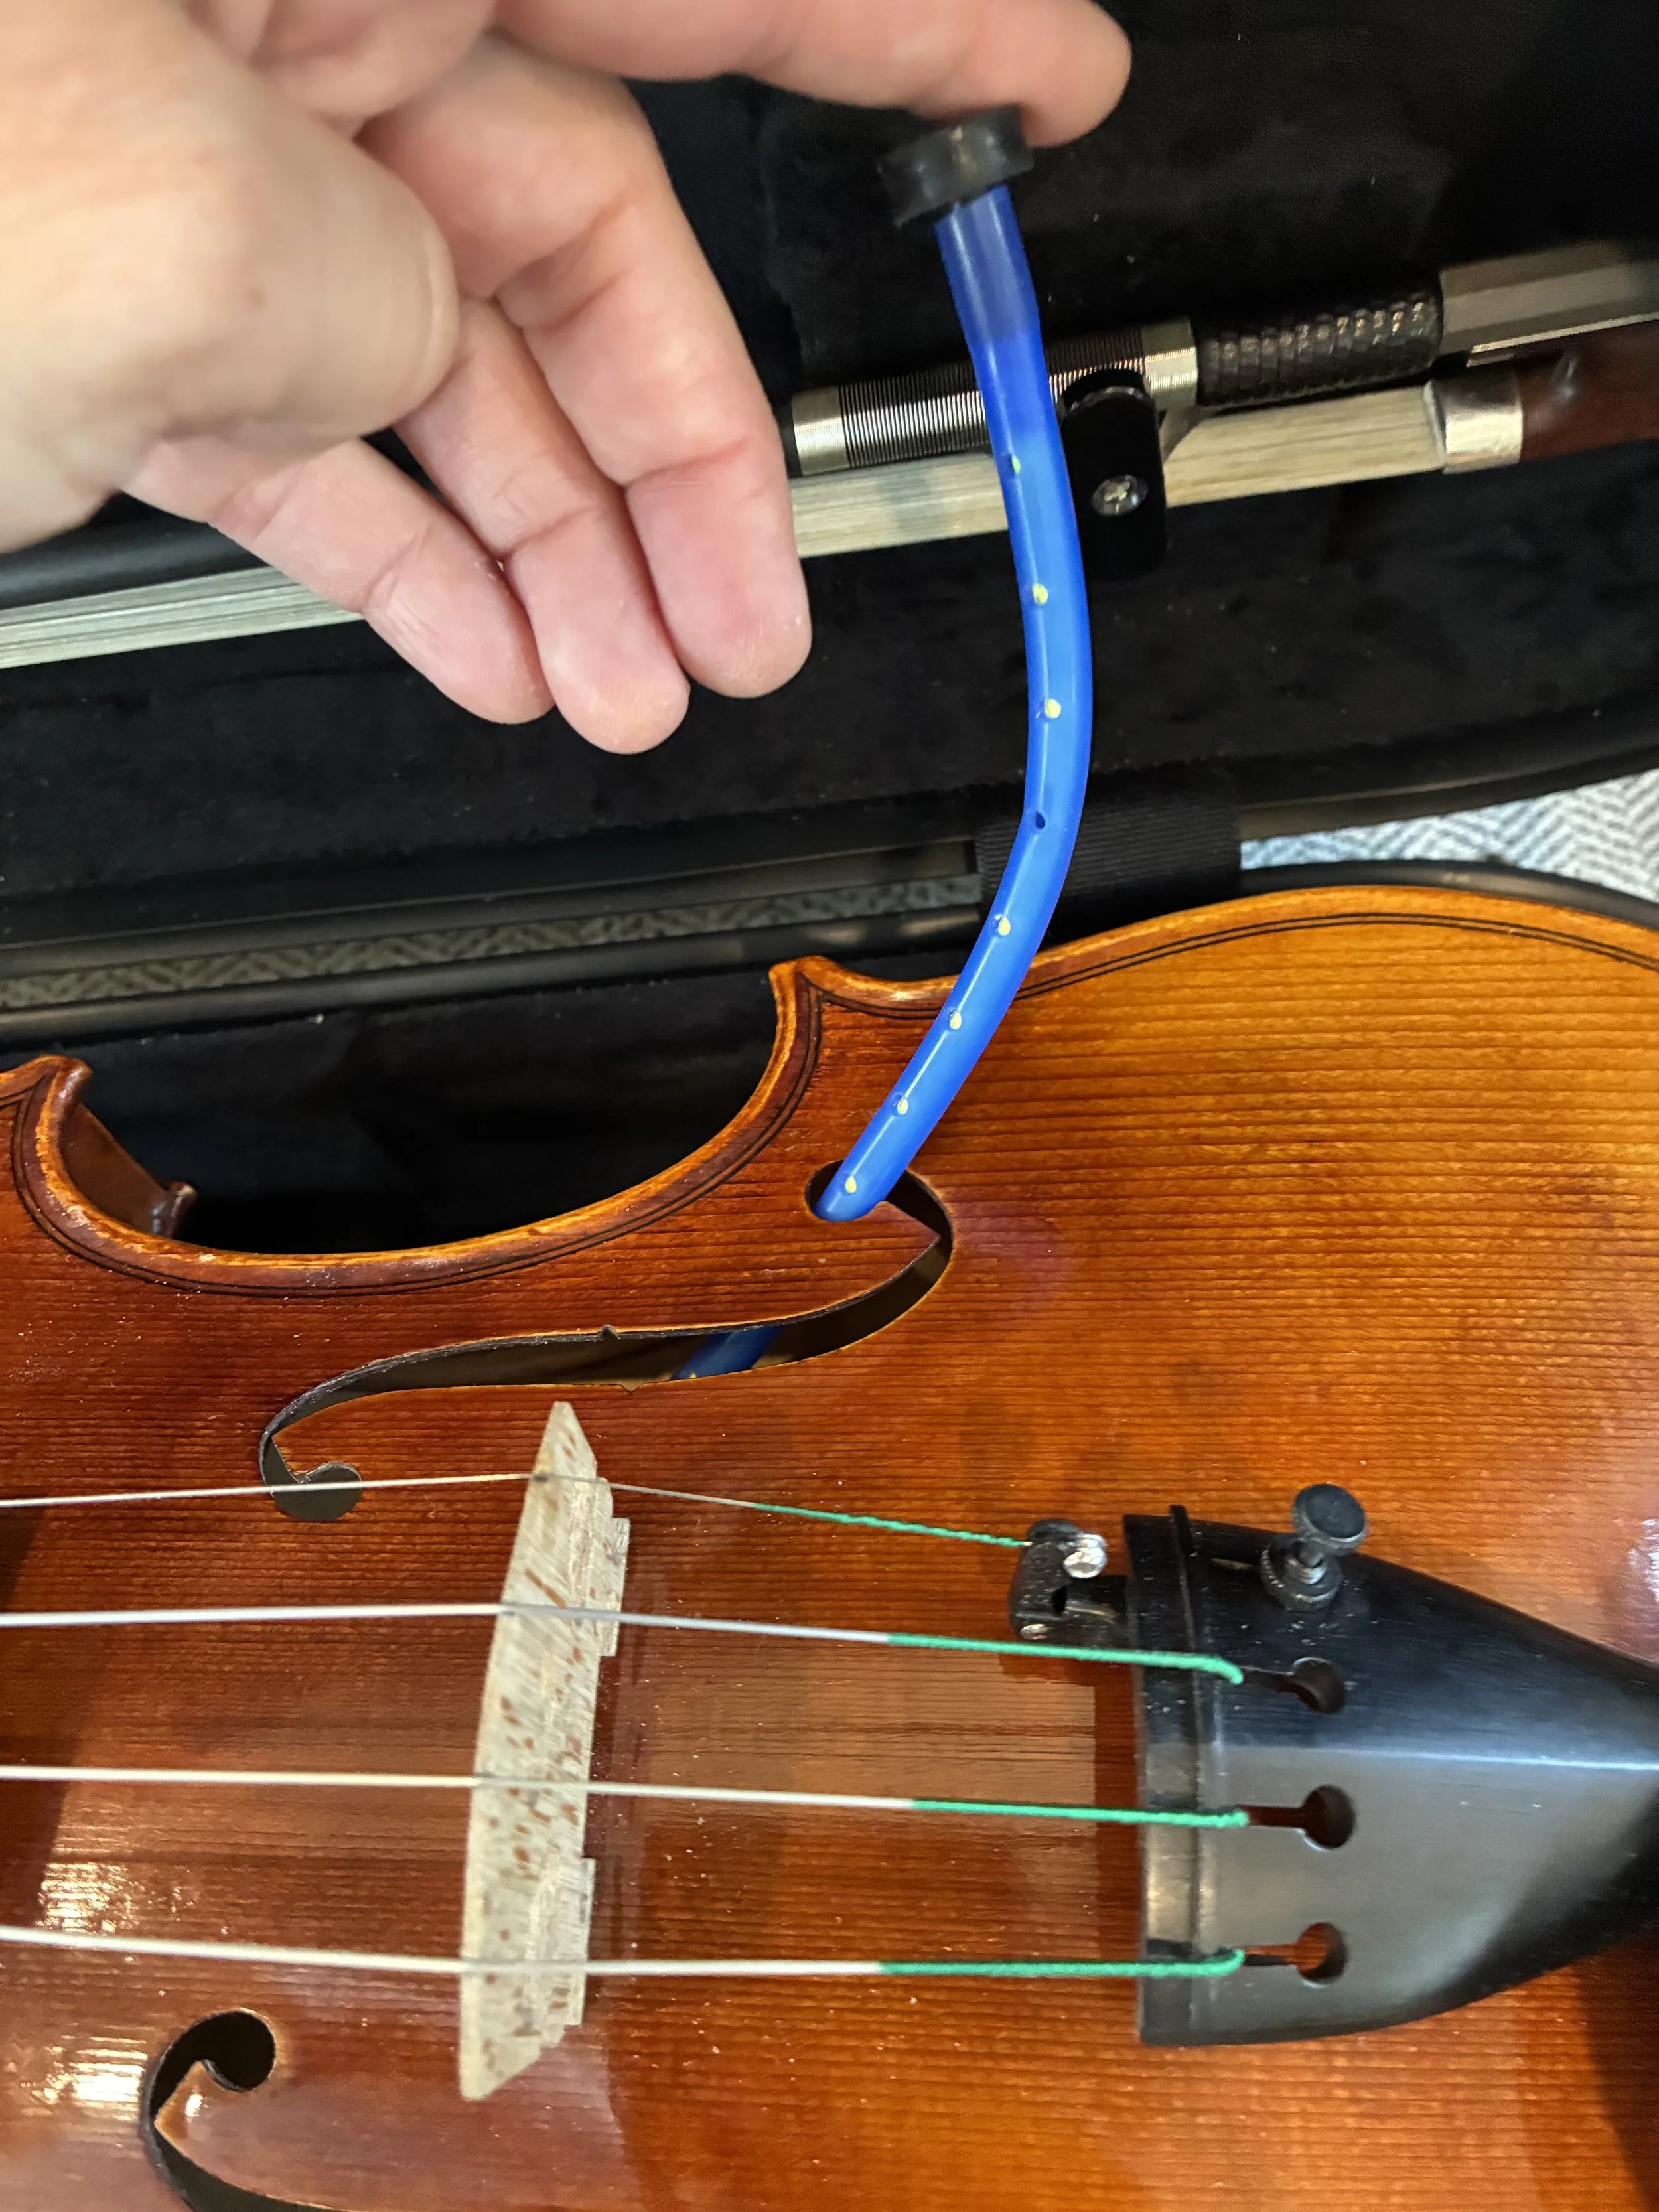
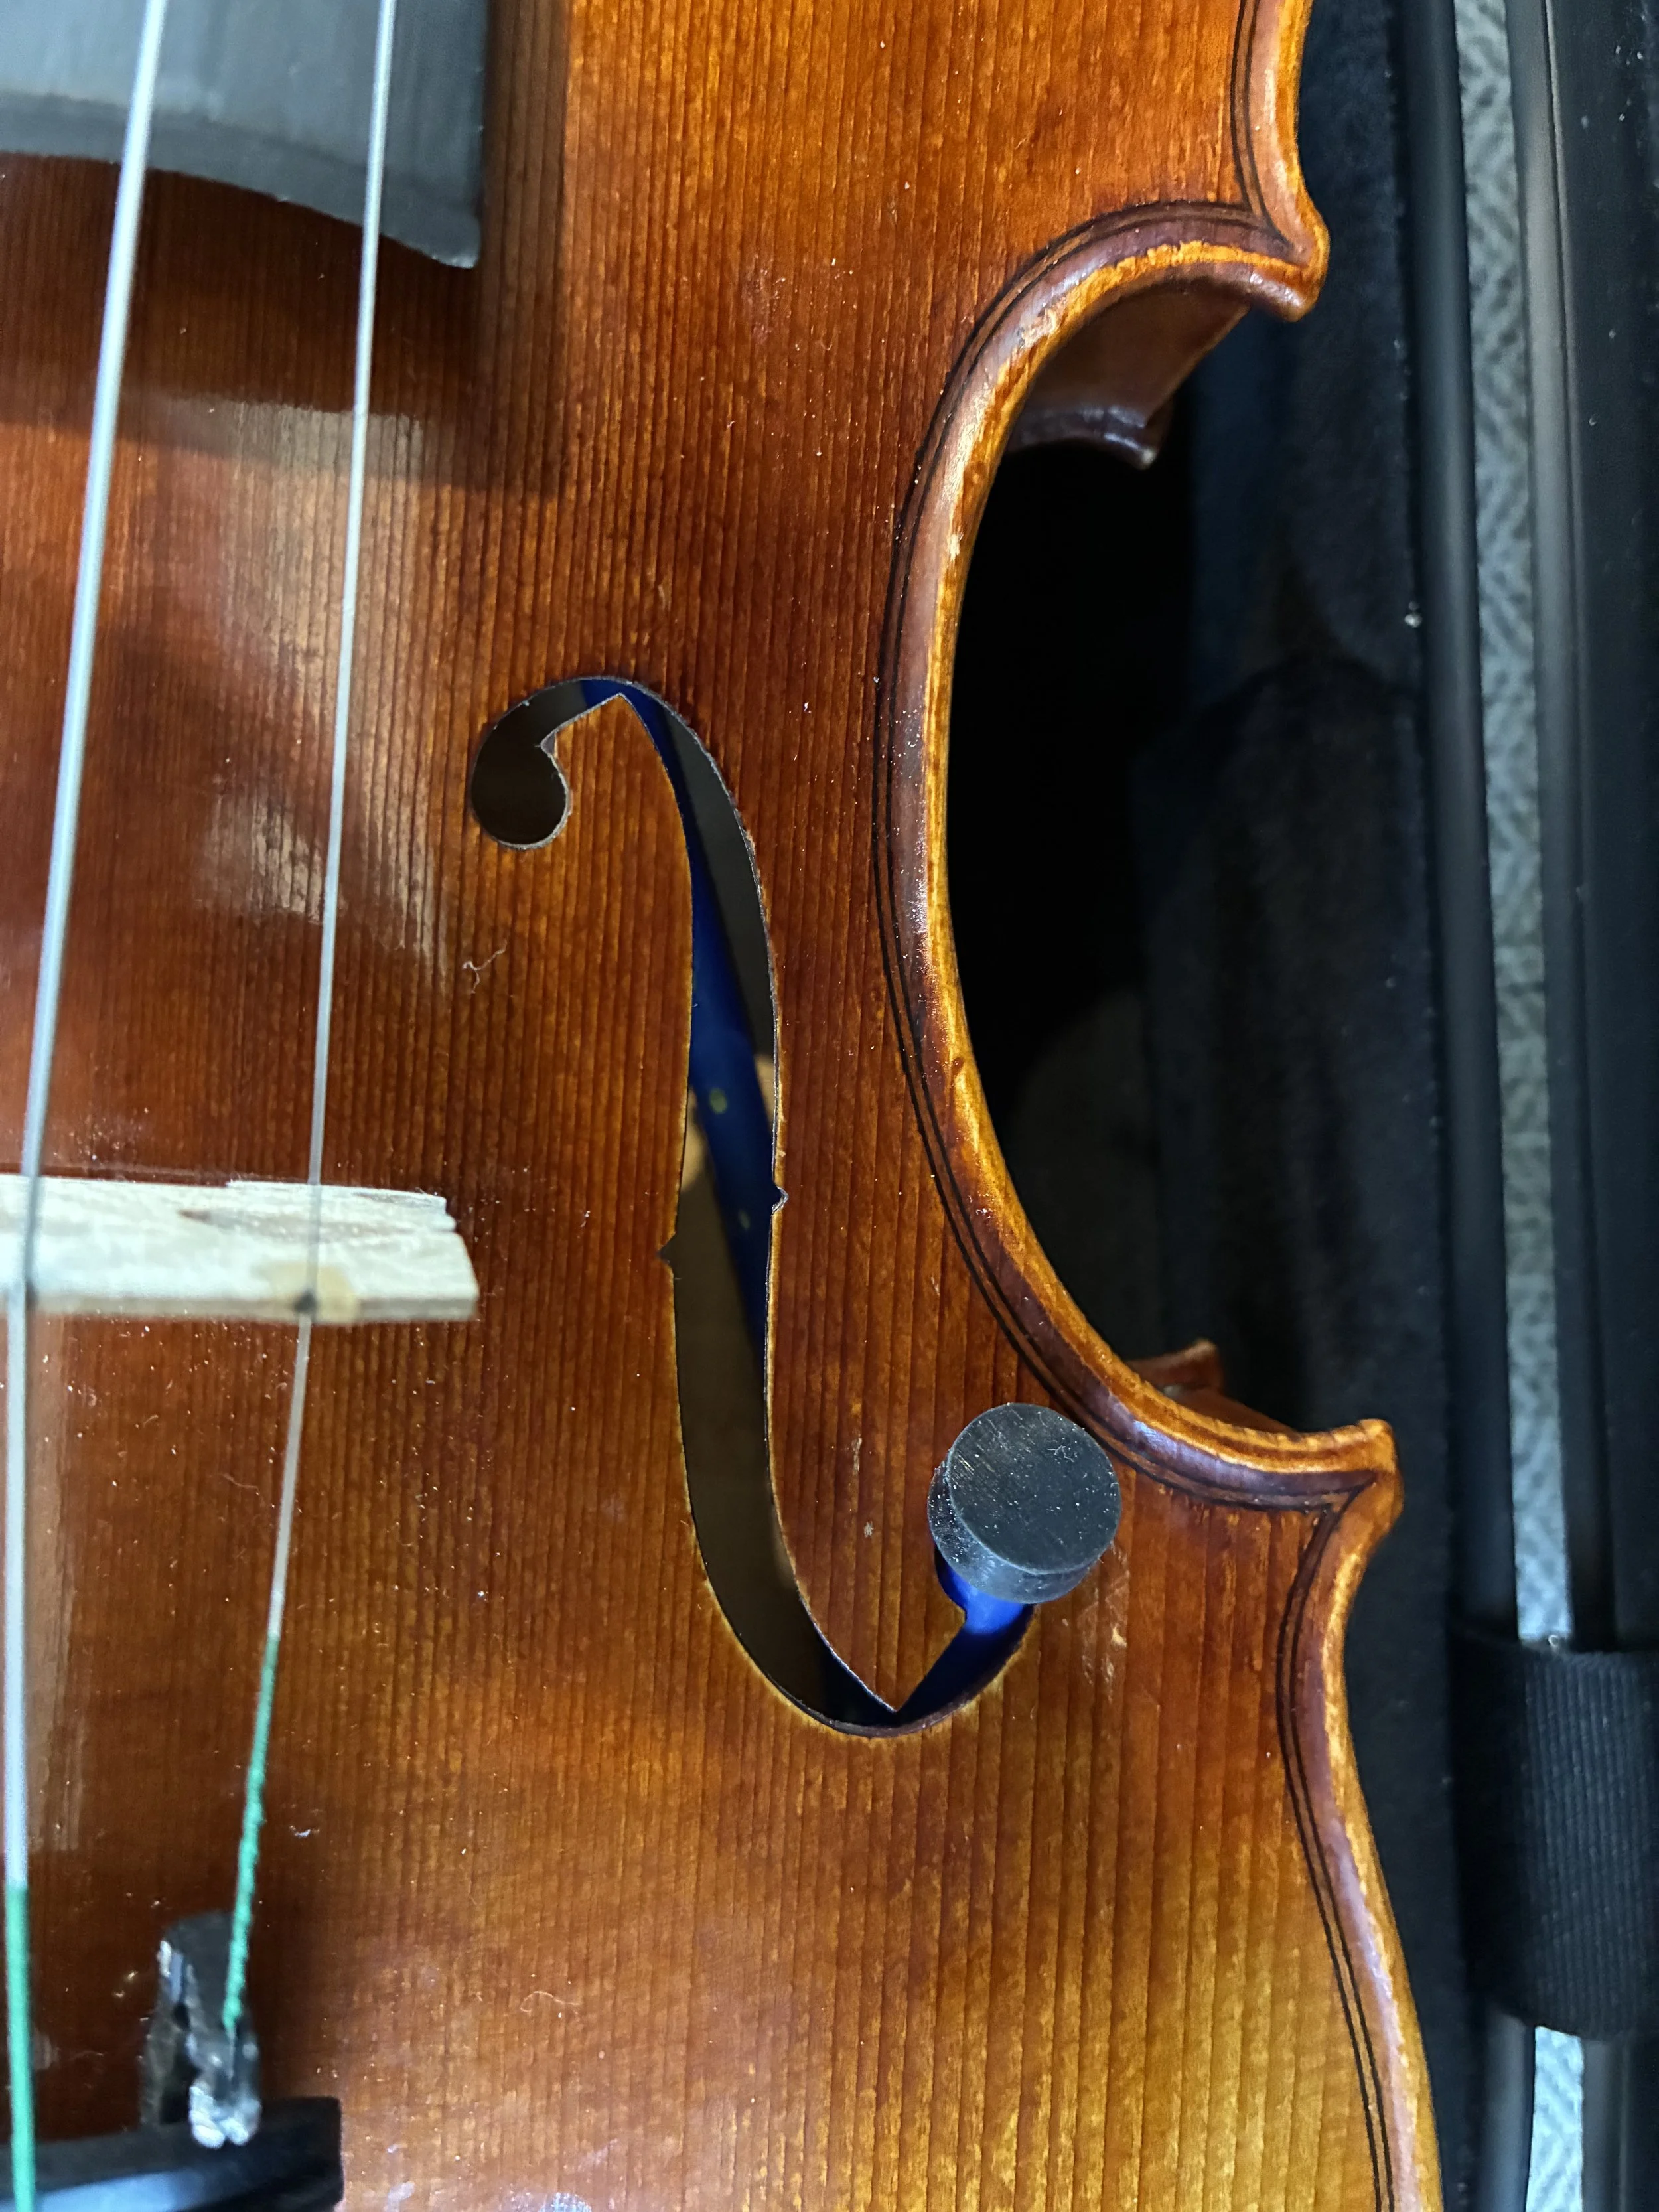
The case also comes with a hygrometer for keeping track of humidity. This is so important when it comes to maintaining the correct humidity level for your violin (ideal humidity is 40%-60%). So I give this outfit a couple of points just for having a good case!
Another plus for this violin, it comes with a pre-rosined bow! Again, that might not sound like a big deal. And yes, you will learn to rosin your own bow. But learning how much rosin to put on your bow to get an optimal sound is a skill. Too much rosin and you run into problems. Not enough rosin and your bow slips all over the place. As a beginner, it’s hard to know if it’s the bow or if it’s you! Plus, brand new bows always take A LOT of rosin. The fact that these bows come pre-rosined by someone who knows what they are doing means you can start playing immediately without the hassle of wondering how much rosin to put on that bow!
With this violin, you won’t need to upgrade for 2-3 years with consistent practice.
Worth investigating: For a nicer wood and appearance, you can upgrade to the Bunnel Premier violin.
Pros
Responsive
Full sound
Pre-rosined bow
Oblong case with hygrometer and a place to put your shoulder rest
Comes with everything you need to play
Great customer service
Cons
Rosin is fine for starting out, but you’ll probably want something better eventually
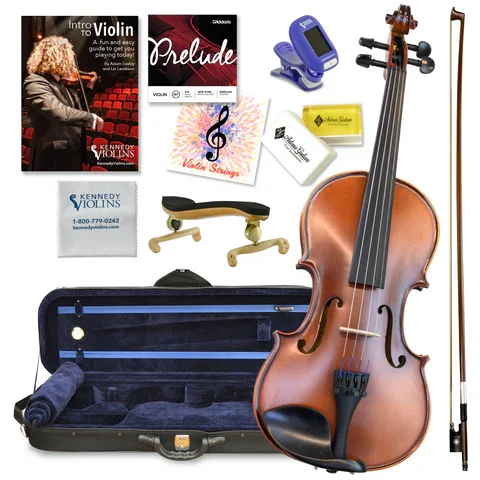
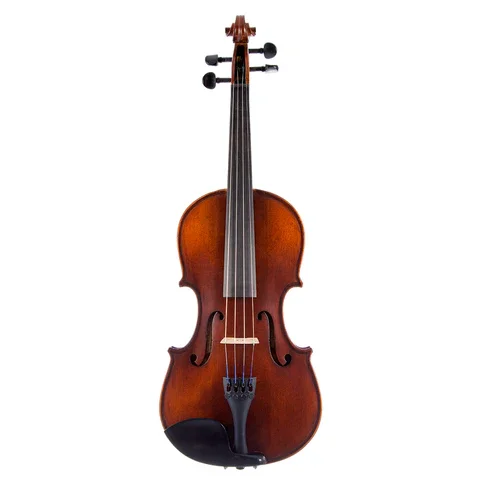
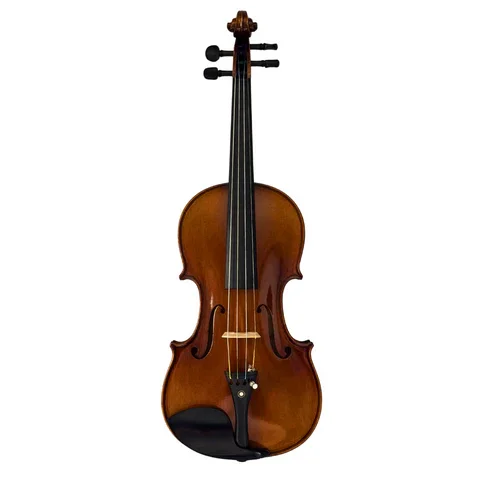
Best Sound for the Money: Antonio Giuliani Etude Violin
This violin has a mid-range beginner price tag, but an advancing beginner sound. If you want a violin that is a step-up from the very basic level student violin, the Antonio Giuliani Etude violin is a great choice.
This violin has much more volume and power than your standard beginner violin. The sound is also clearer and cleaner without that muddled, or tinny quality you may notice with cheaper violins. The appearance is also very lovely with a dark finish and beautiful wood.
You also get an upgrade in accessories like a better case. This case feels pretty sturdy compared to your standard beginner level outfit. (It’s oblong so there’s a place for your shoulder rest and it has a hygrometer too!)
Overall, this is a fantastic violin if you want something better than the standard beginner violin. The improved sound quality and response means you’ll be able to stay on this violin for longer before you need an upgrade. With consistent practice, it would probably be a good 3-4 years before your skills and your ear are ready for something more.
Pros
Clear sound
More volume and power
Beautiful, more professional finish
Pre-rosined bow (it makes a big difference if you’re just starting to learn!)
Nice, sturdy, spacious case
Correctly set-up and ready to play
Option to install geared pegs before it’s shipped
Cons
There really aren’t any. This is a great violin for the price range.
The bow is fine for starting out, but the Premier Brazilwood bow is definitely worth the upgrade.
Recommended Upgrades
Giuliani Premier Bow. This is a great little Brazilwood bow that can actually handle quite a bit of bow technique!
Dominant Strings
Geared Pegs
The Easiest Violin to Tune: Tower Strings EasyTune
This Tower Strings Entertainer violin is the same violin as the first violin in my list, but it comes with geared pegs already installed! This does bump the price up quite a bit, but if you said yes to any of the bullet point above, it’s a great upgrade.
If you missed the discussion on what geared pegs are why you need them, click here.
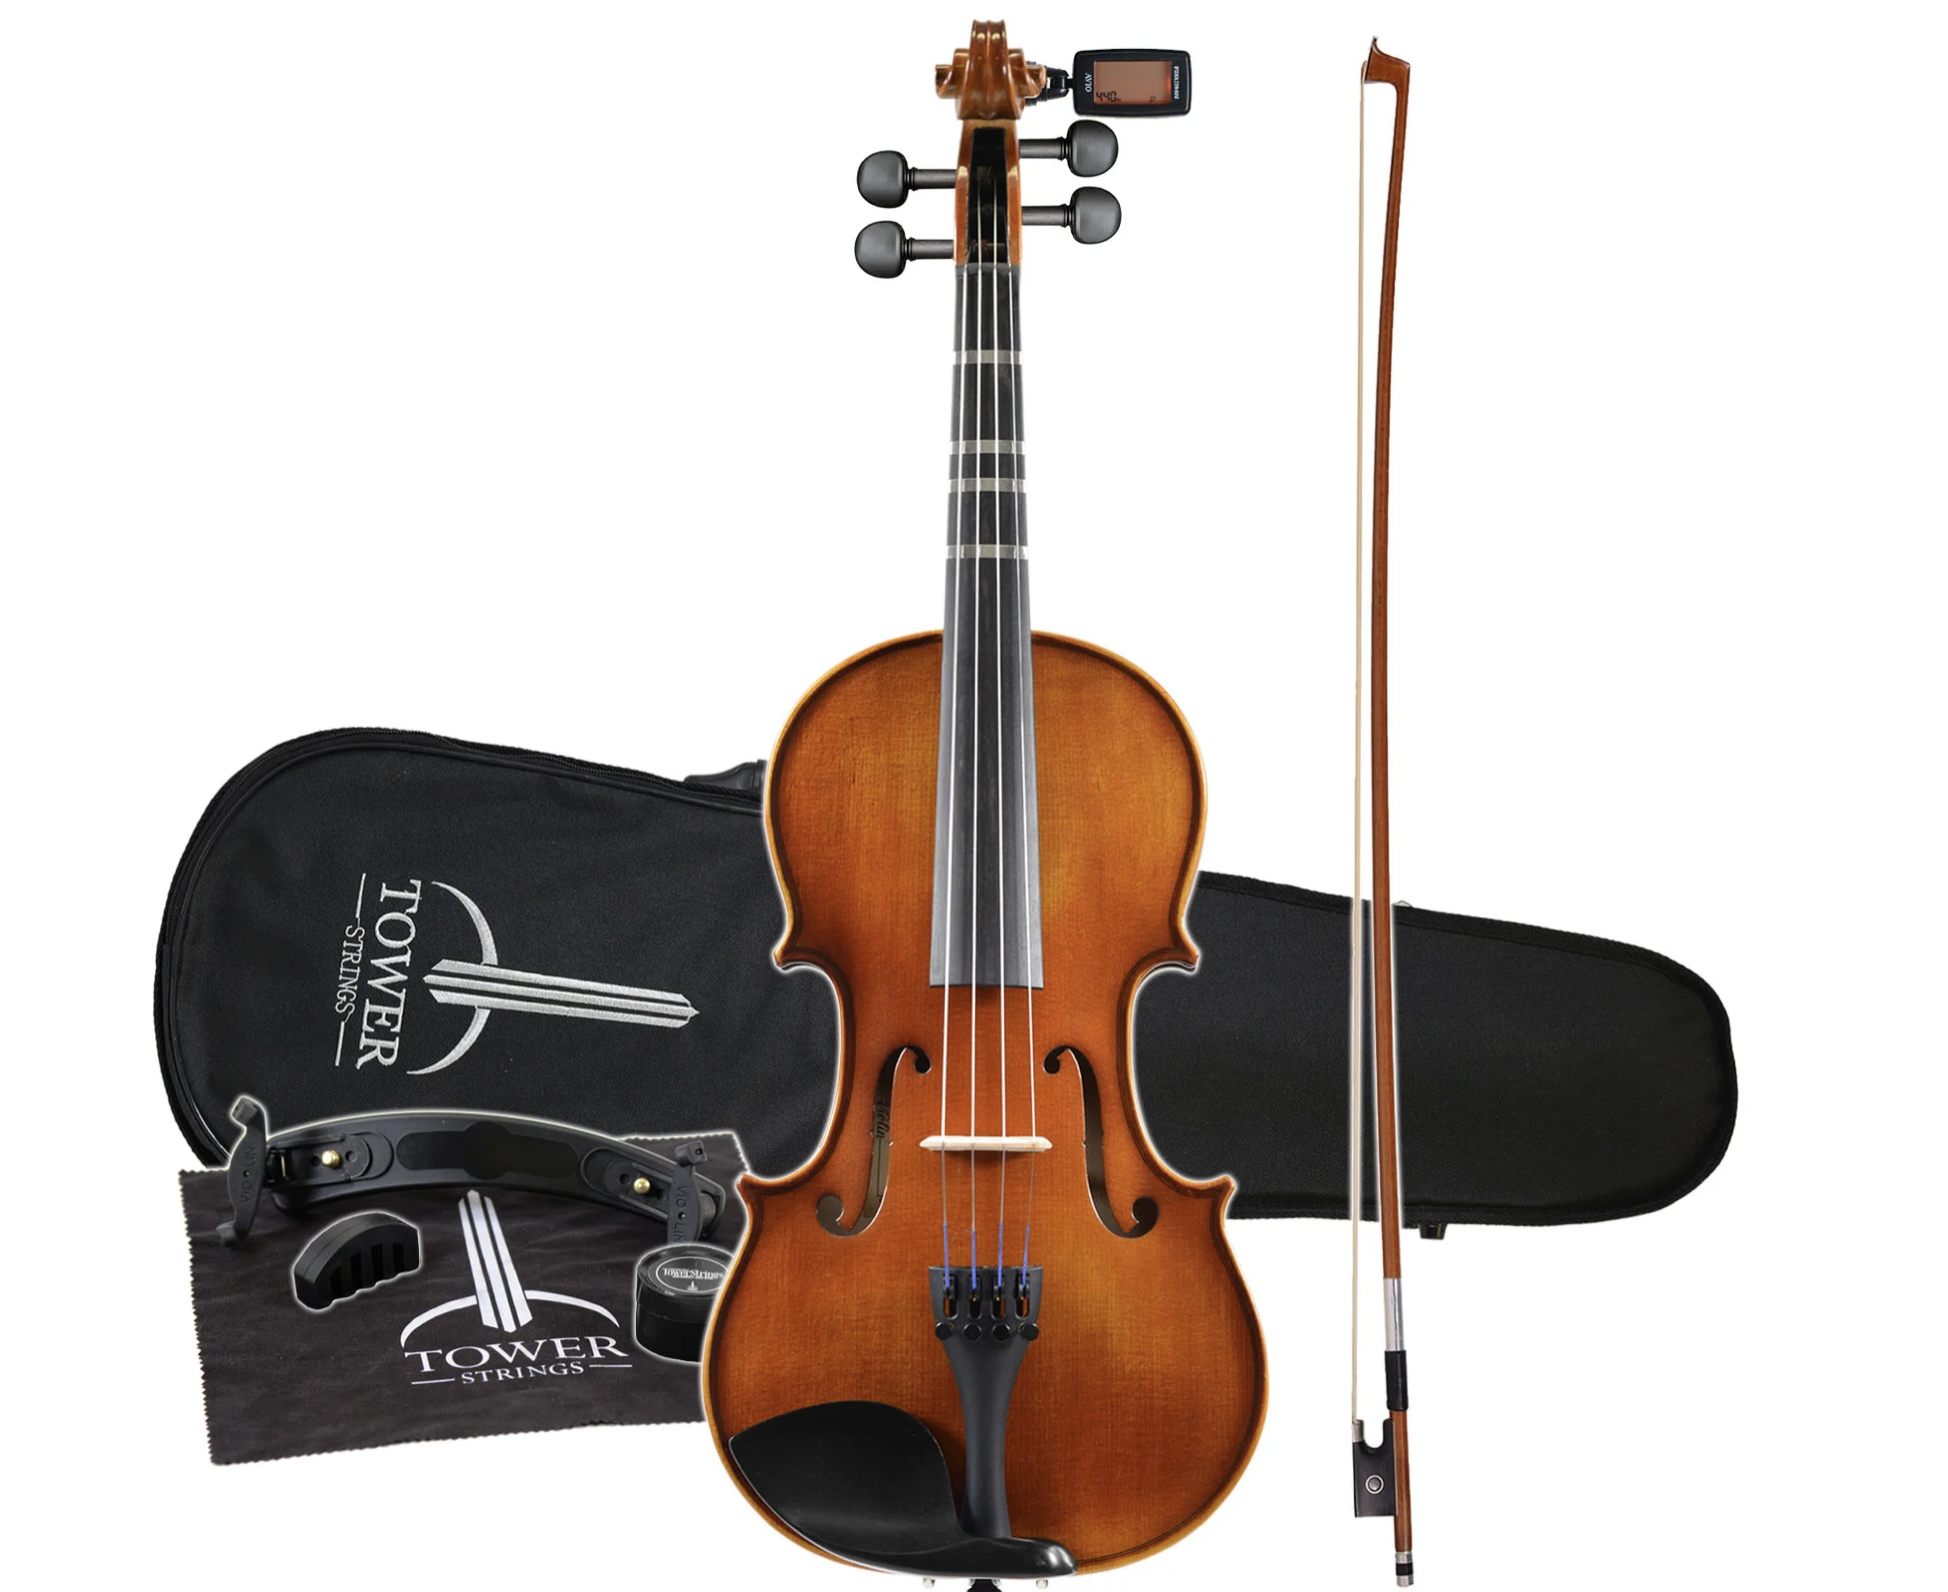
*Please note: You can have geared pegs installed on ANY violin you order from Fiddlershop or Kennedy Violins for an additional charge.
Pros
Easy to tune with geared pegs already installed!
Cons
The geared pegs do offer a significant price increase. If you’re okay with tuning, you could purchase a better quality violin for this price.
This violin also comes with fingerboard decals installed. I’m not a huge fan of these, but you can always peel them off!
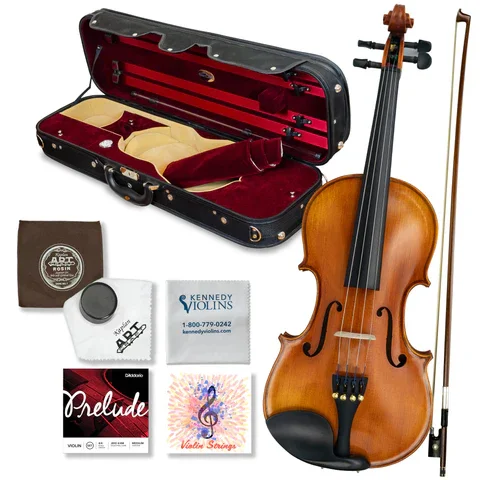
A Great Sound with Optional Boxwood: Fiddlerman Concert Violin
Fiddlershop has a whole line of Fiddlerman beginner violins. Their Fiddlerman Concert violin is one of my favorite for its improved sound quality, appearance, and optional upgrades. This is a mid-range beginner violin, so if you want to browse less expensive violins in the Fiddlerman lineup, checkout the OB1 and the Apprentice violins.
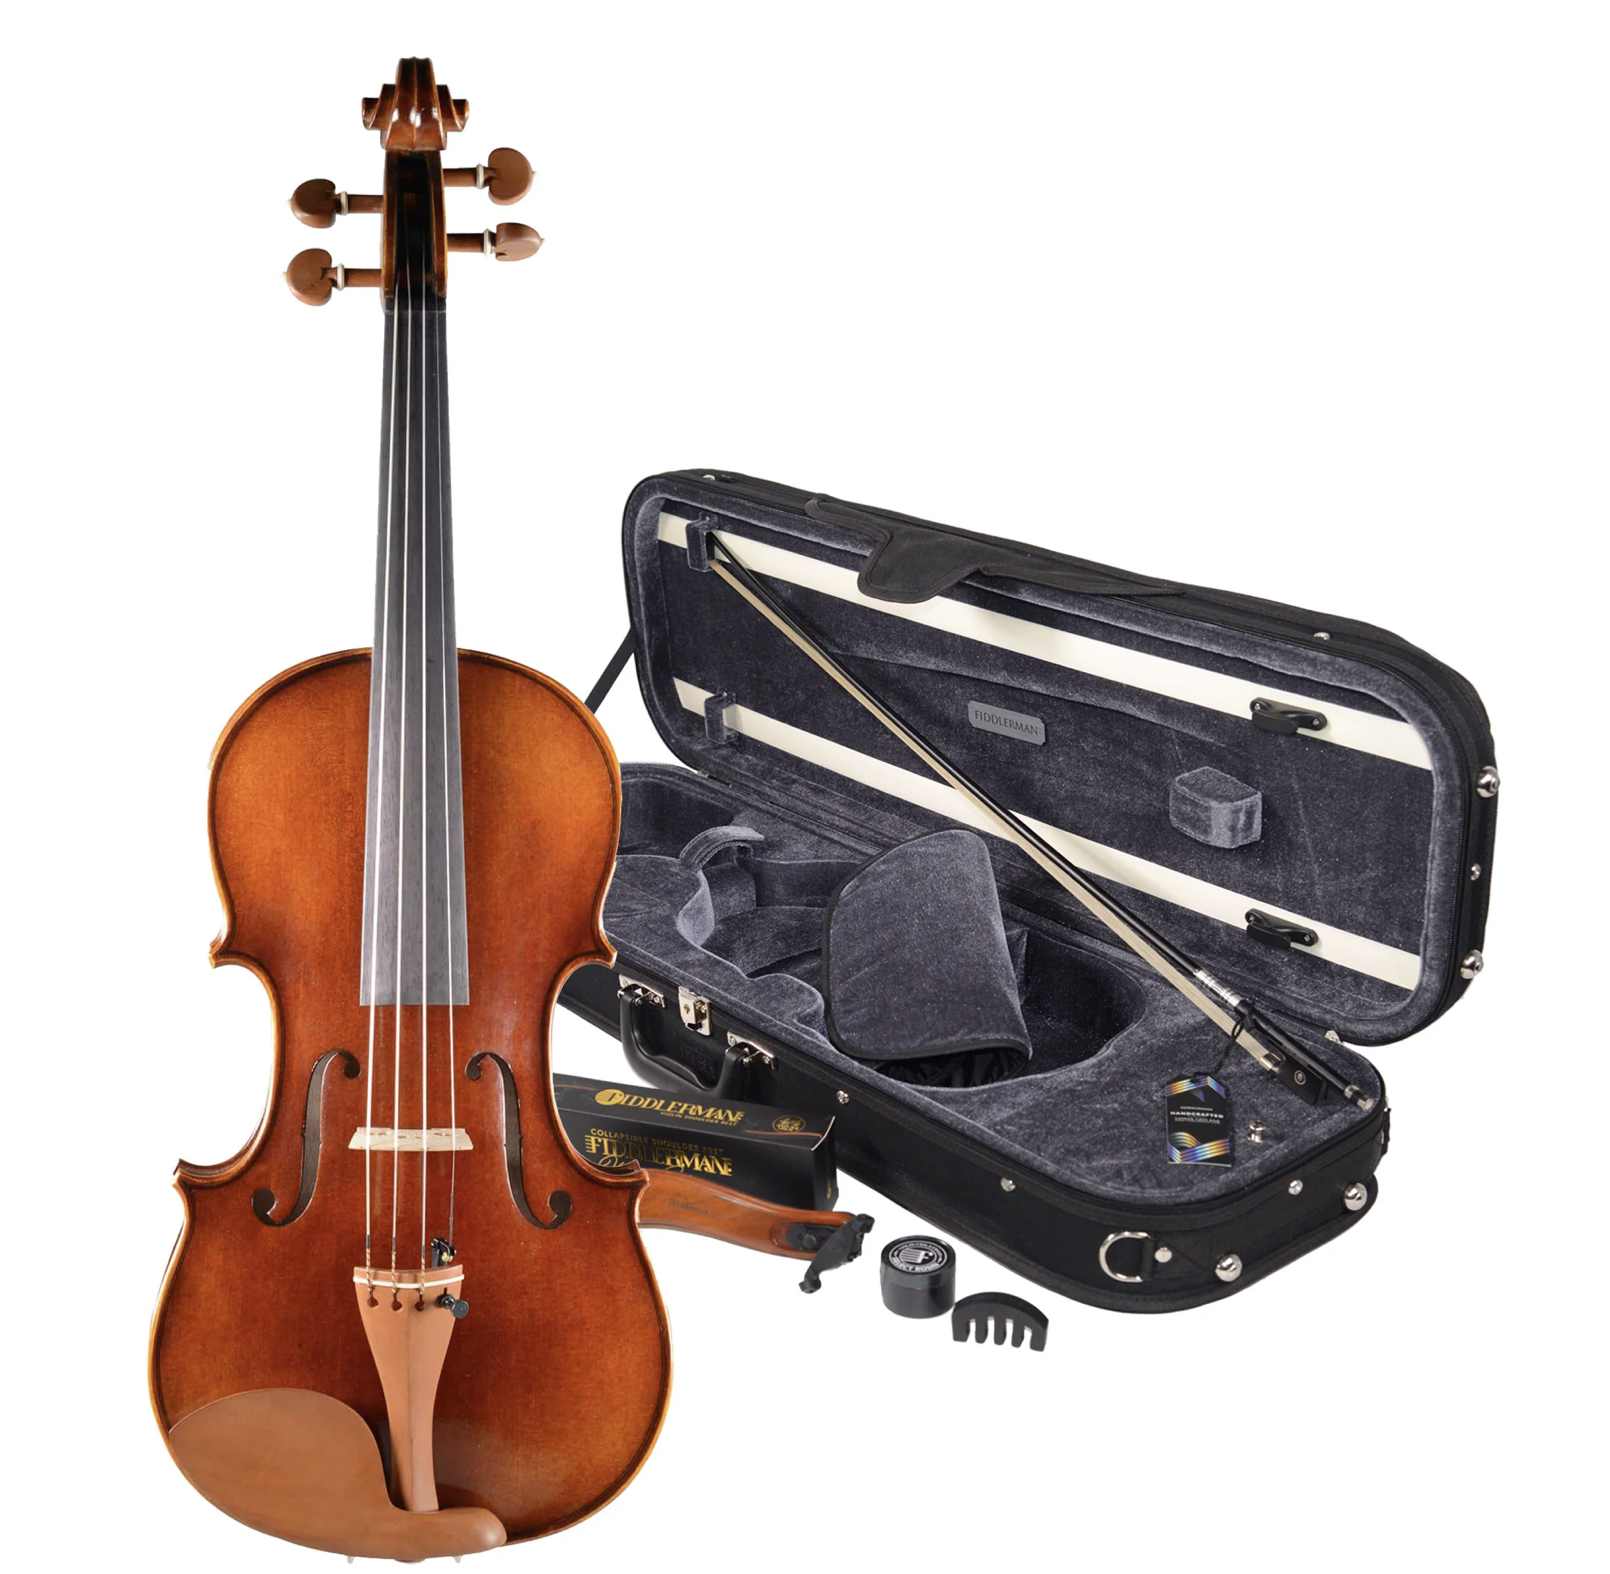
The COncert Deluxe Violin with Boxwood
I was pleasantly surprised at the rich, powerful tone of the Concert violin. It’s a great choice if you want a better sound that you can grow into. This violin also comes with an upgraded carbon fiber bow, which is a great little bow for starting out! In fact, I would say the Fiddlerman carbon fiber bow is the best student level violin bow I’ve ever tried. With this violin, you probably won’t need an upgrade until 4-6 years of consistent practice.
The Concert Violin also has an upgrade Concert Deluxe Option. The Concert Deluxe violin is the exact same violin as the Concert violin, but it has a boxwood chinrest, tailpiece, and pegs. This is an aesthetic upgrade, but you will commonly see boxwood on more expensive violins so it definitely gives this violin a nice, classy touch!
The combination of Fiddlerman strings with the carbon fiber bow made playing extremely easy and forgivable. Normally this quality of strings and bow would be an upgrade for other outfits, but it is standard with Fiddlerman violins.
All Fiddlerman violins come with a 10 point inspection so you know your violin is set-up in the best way possible. Every violin that is tested and played by a luthier before being shipped. The violin also comes as an outfit with a case, carbon fiber bow, rosin, a mute, cleaning cloth, and a quality violin shoulder rest, and a digital tuner. Normally I say to watch out for outfits that include so many goodies, but these goodies are actually worth having! You literally need nothing else to start playing.
One thing I love about Fiddlershop is that they can install perfection pegs on any violin you buy. Plan to add about $100 plus the cost of the pegs to the price for this upgrade.
Want to really save money? Fiddlershop often has discounted B stock violins for sale. They are perfectly playable with minor cosmetic defects. Check out the discounts here!
If you are willing to spend a little more, I recently had a student buy a Symphony violin and it sounds phenomenal!

Pros
Fiddlerman Synthetic Core violin strings (my favorite beginner level string)
Fiddlerman Carbon Fiber Bow (the best beginner bow I’ve ever tried)
Powerful sound
Attractive finish
Upgrade options for boxwood hardware
Cons
The rosin and shoulder rest iare good for staring out, but you’ll probably want something different as you continue playing.
This is a great bow for starting out, but with consistent practice, plan to upgrade your bow in a year or two to get even more sound out of this violin.
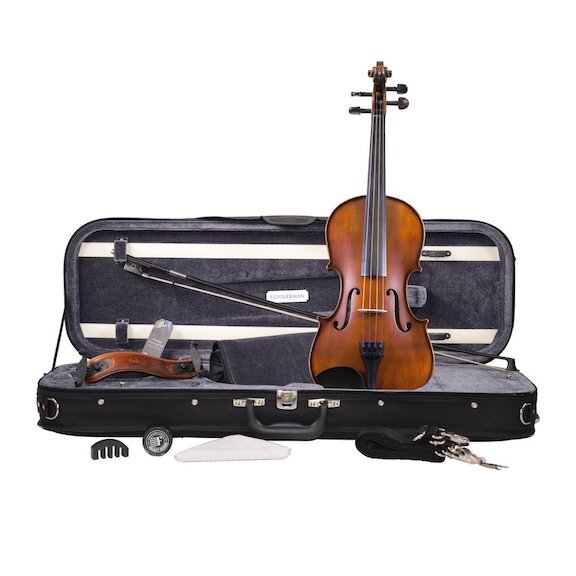
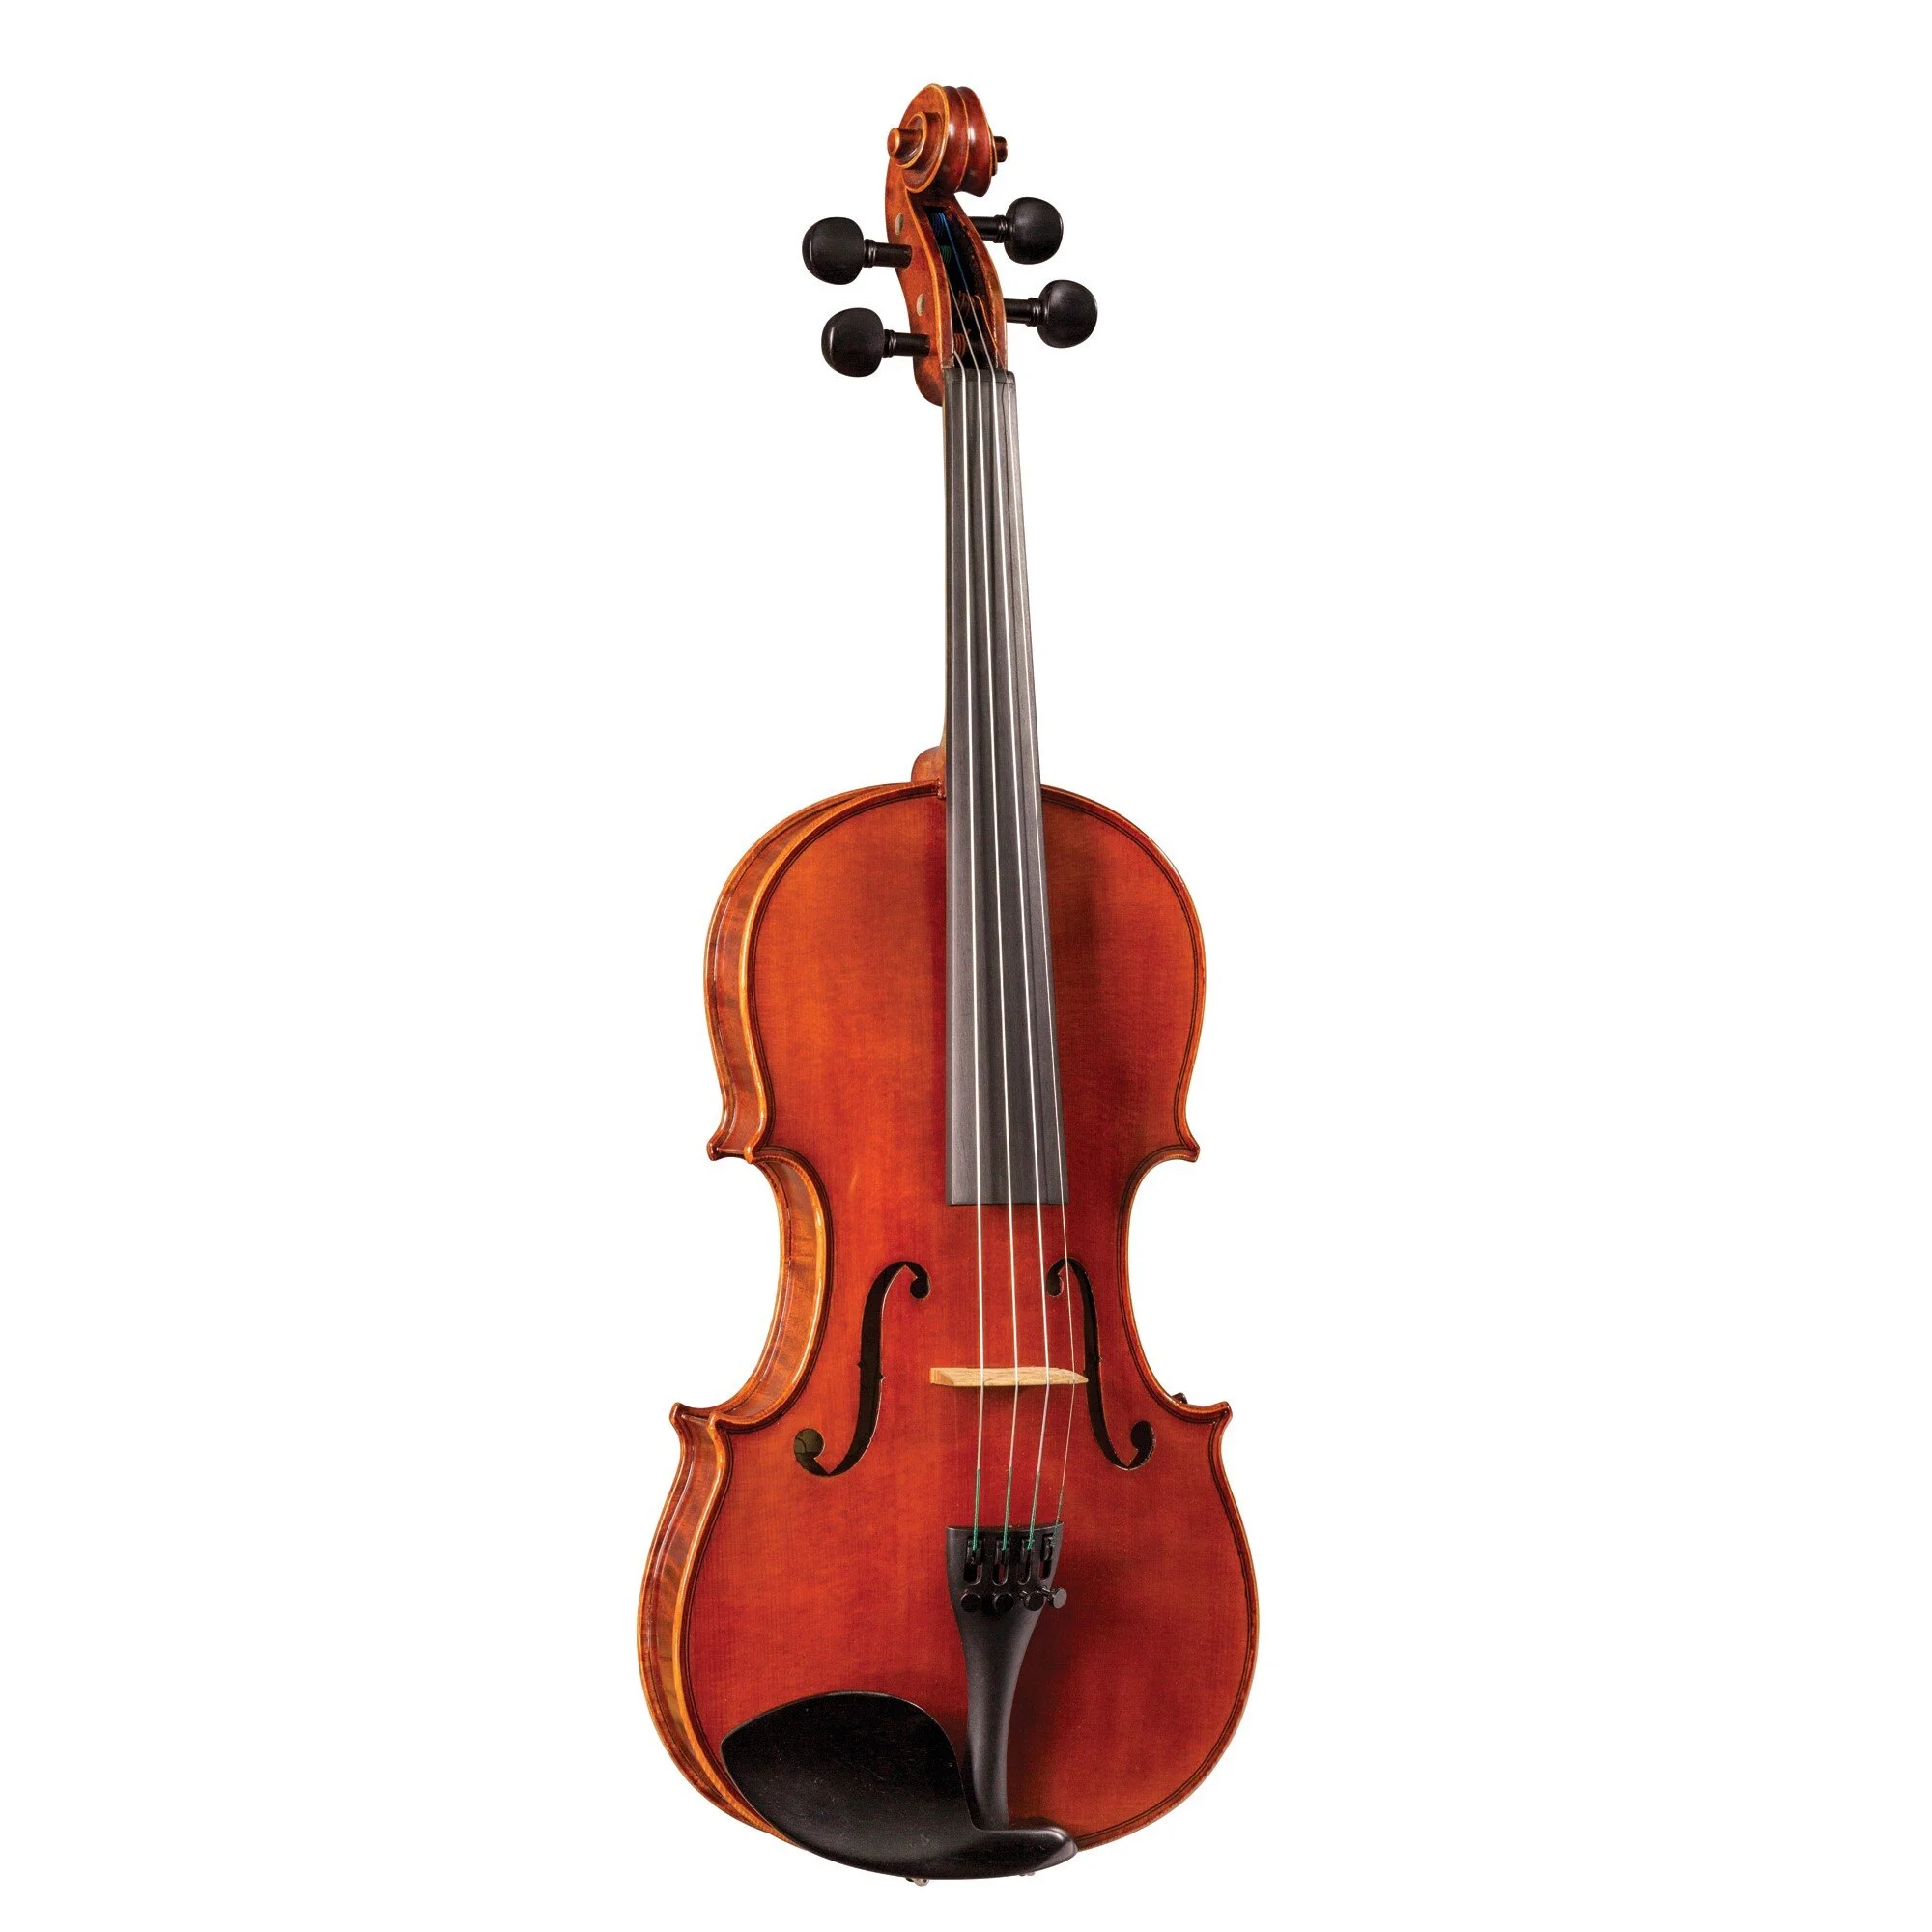
If you don't want to upgrade anytime soon--Bright, clear, focused and easy to play: Louis Carpini G2 Violin
One of the common questions beginners will often ask themselves is: “is it me or is it the violin?” You’ll make a lot of unwanted noises when learning to play, that’s just part of it! But the violin can definitely make a difference. If all the talk of upgrading after a few years has you scratching your head, then buying a better quality violin from the start is a great decision.
When I first played the Louis Carpini, I instantly fell in love with the sound. I like clear, focused violins and this one delivers. In many ways it’s comparable to another violin I own that is twice the price of the Louis Carpini. Now you may be thinking, I don’t want a bright violin. “Bright” seems like it might be shrill and loud, but that’s not the case with this violin.
Bright means:
Very resonant (it keeps ringing)
Clear (the sound isn’t muddled at all)
Projecting (it projects into big spaces without being too loud)
Very responsive (as soon as you ask the violin to do something, it does it).
This is very important when it comes to better intonation (the resonance allows you to hear the pitches better), producing a stronger tone (the violin will take it), and creating dynamics. While this violin is bright and resonant, it also has an openness to the sound which I love. And the E string is not too bright. It has a sweetness to the tone that is very lovely.
For the price, this is a phenomenal violin for anyone who wants a great violin from the start and doesn’t want to worry about the violin holding you back.
Because of its projection and its ability to play forte without maxing out, the Louis Carpini is great for anyone thinking about playing in church groups, orchestra, or other performance venues.
This violin doesn’t look “studenty” at all. It’s got a lovely, slightly blonde finish with better quality wood that makes it look more professional.
The Louis Carpini is suitable for intermediate and advancing students. Since it’s capable of handling advanced techniques, that means if you purchase this violin as a beginner it will not hold your technique back at all!
Pros
Clear focused tone
Great projection
Super resonant
Sweet sound on the higher strings
Beautiful appearance with lovely wood
Pre-rosined bow! (Really helpful if you’re just starting out)
Better Rosin and Better Case
A violin for intermediate and advanced students with 4 fine tuners (many in this price range only have 1)
Cons
There really aren’t any. The Premier bow is an upgrade which I definitely recommend to match the quality of the violin.
Recommended Upgrades
Giuliani Premier Bow. This is a great little Brazilwood bow that can actually handle quite a bit of bow technique!
Dominant Strings (this violin will last you, so go ahead and put better strings on it. It shines even more with better strings.
Geared pegs. If you’re purchasing a violin you know you’ll use for a long time, geared pegs is a worthy upgrade.
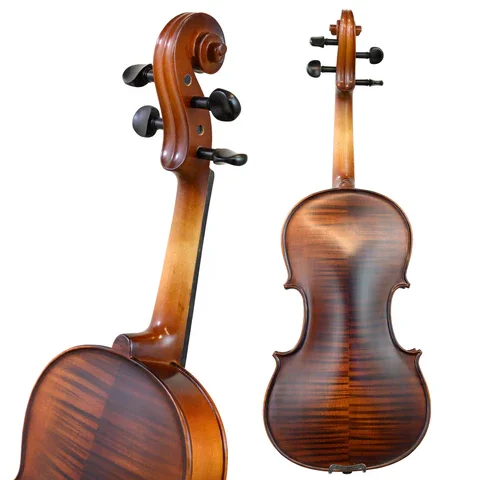
A violin with a complex, warm sound that will take you into intermediate and advanced playing: The Nicholas Gand Violin
If you like a violin with clarity, but want something a little darker and warmer (in both appearance and sound) the Nicholas Gand is a great choice.
This violin features a tone that is a nice blend between warmth and projection. As you get into violins in this price range, you’ll notice the tone becomes much more complex sounding (and that’s a good thing). It’s rich with overtones, neither too broad nor too focused.
The darker varnish and the wood flame on the back are absolutely gorgeous as well.
I love that this outfit comes with the upgraded Premier bow. This is quite and impressive bow for under $100. Once you learn the basics, upgrade the bow to get even more out of this violin.
This violin is suitable for intermediate and advanced players, which means if you purchase it as a beginner, you won’t need to upgrade for a long time (if you ever upgrade at all!)
Pros
Warm, complex tone
Lovely dark varnish
Better Premier Giuliani brazilwood bow is standard
Bow is pre-rosined!
More standard case options
Cons
This violin definitely deserves better strings, like Dominants, so add those to the upgrade list!
One fine tuner. This isn’t necessarily a “con” because it’s standard on violins of this price range. However, if you are just starting to learn violin, I do recommend having 4 fine tuners installed or upgrading to geared pegs to make tuning easier.
Recommended Upgrades
Giuliani Premier Bow. This is a great little Brazilwood bow that can actually handle quite a bit of bow technique!
Dominant Strings (this violin will last you, so go ahead and put better strings on it. It shines even more with better strings.
Geared pegs. If you’re purchasing a violin you know you’ll use for a long time, geared pegs is a worthy upgrade.
Carlo Lamberti Sonata Violin
This violin offers a good blend between the beginner and intermediate levels with a price point to match. These violins are made in China and then shipped to the U.S. where they receive the correct set-up from a qualified luthier. Some of my students have this violin model and they enjoy a superior, focused tone. This violin comes with a comfortable chin rest, a tailpiece with fine tuners built-in (for ease of changing strings), and Thomastik Vision strings, a good intermediate level set of strings.
Shar Music offers various upgrades in the Carlo Lamberti Line such as the Classic, Symphony, and Master Series.
Pros
Strong Tone
Tailpiece with built-in fine tuners
Good strings
Good for advancing beginners
Cons
Doesn’t come as an outfit
What violin brands to avoid?
Many times, a new student will come to a lesson with a violin that won’t stay in tune. The sound is scratchy, the bow is difficult to control, and the strings are difficult to press down. Sometimes the bridge doesn’t have the correct curvature and the student will continuously hit other strings. I can usually guess what brand of violin this is. There are two repeat offenders: Mendini and Cecilo. Many students purchase these violins because they look like decent violins, but they are far from it. While these two companies do make more advanced beginner level violins, they also sell cheap VSOs. While I’ve never tried their more advanced models, I don’t think I want to. When there are so many other great beginner violins out there, why support a company that produces what I would call a gimmick?
Violin Brands To Avoid
Mendini (quality control is really hit or miss)
Cecilo (same as above: quality control is all over the place. Some are decent, some are VSOs)
Eastar
Lagrima
JMFinger
Aliyese
Amazon Basics
Sky
Vangoa
Amdini
Since there are more BAD “violins” out there than good ones, this list could go on and on. Basically, be wary buying on Amazon, Wal-Mart, or other big box stores. Be wary buying from large music stories as well. It’s not only about getting a quality instrument, it’s about getting one that’s properly set-up by a luthier before it’s shipped to you!
What violin would I buy?
Okay, you probably know I’m going to say one of the most expensive violins. But seriously, I know how good sound production and responsiveness makes such a difference for your playing. If I were an adult buying for myself, I would go for the Louis Carpini G2 (it’s not splurging, it’s ensuring you get the most out of your precious practice time). If I were buying for a student who was playing in orchestra and making regular progress, I’d go for the Antonio Giuliani Etude or the Fiddlerman Concert violin. If I needed a fractional violin for a young child who will be upgrading frequently, Tower Strings will be just fine.
Shop Wisely
One thing I’ve noticed while searching for “the best beginner violins” is a plethora of websites listing what they claim are the best beginner violins. I’ve found that many of these websites recommend violins that I know from experience are atrocious. As you read their pros and cons on a particular violin, you may be able to tell that the writer has no experience with this violin at all, they are simply regurgitating reviews. While many of these websites are legitimate, many exist to make money off of affiliate links. Affiliate links allow website owners to make a small commission on products, at no cost to the person using the link. I too use affiliate links as a way to help support the cost of the website, but I don’t promote products for the sake of earning a commission. The whole reason I created my website was to educate students and stop them from wasting money on VSOs.
Don’t be fooled! Purchase a quality violin and you won’t regret it!
Check out my Step by Step Guide to Starting Violin Lessons and double check that you have everything you need to make learning the violin fun with my checklist on What to Buy for Violin Lessons.

While your violin is on the way, go ahead and sign up for my free course to get you started playing!
You’ll learn the basics to get you started like:
How to tune the violin (and lots of gotchas)
How to put on the shoulder rest (and how to adjust it)
How to hold the bow
How to play an easy song!
===>Click here to sign up for Learn Violin Or Refresh the Basics for free!


![10 Best Violins for Beginners: A Violin Teacher’s Ultimate Guide [2026]](https://images.squarespace-cdn.com/content/v1/554545e3e4b0325625f33fa6/1600433065588-JQV56M1W9LNI833AVGEE/10+best+violins+for+beginners+2020.jpg)